|
Fly of
the Month
Bob Ireton brings together his
experience in fly fishing, aquatic entomology, and knowledge of fly
tying techniques and materials, to design and tie durable and
effective flies.
|
|

Volume 6, Issue4
April 2005

THE UNIVERSAL FLY
Fly, Text, and Photography by Bob Ireton
I know most of you have heard of this
fly, and as likely as not, have also used it. No other pattern that I
know of even comes close as a fly that is very popular, easy to tie, and
super effective! It can be endlessly modified, and ‘artistic license’
can abound with this pattern. Tie it in ‘white or olive’, and fish it
like a streamer, and it imitates a minnow. Tie it in black, and it can
be a hellgrammite, or a leech. A brown fly fished with a ‘twitch’ in a
rocky bottom becomes a crayfish. The brown version can also be tied in a
smaller size, with a short tail, and it imitates a nymph. Other
modifications make it a dragon or damsel fly larva. I bet if you tied
this pattern with buoyant materials, it would do well on the surface.
Have you guessed which pattern this is? It is the old standby, the
‘Woolley Bugger’! If they’re ever was a fly that could be called ‘The
Universal Fly’, this has to be it!
MATERIALS
Hook – Daiichi 1750, Mustad 9674,
Orvis 0167, TMC 9395, or equivalent
Size – 4-16.
Base Thread – Brown 6/0..
Weight - .025 lead wire, or
equivalent.
Working Thread – Gray Uni 6/0.
Tails – Brown marabou.
Body – Brown ultra chenille.
TYING STEPS - click on
pictures for larger view
|
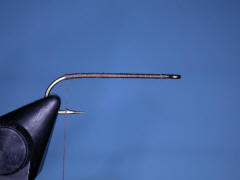
1 – Place the hook properly in the vice. I am using a
Daiichi 1750, size 10, for this fly. Any standard streamer hook will
work. Mash down the hook barb, if desired. Attach the thread behind the
hook eye, and lay on a solid base rearward, stopping above the barb. Tie
a half hitch. |
 |
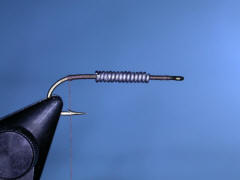
| 2 – Using lead wire, or equivalent,
the diameter of the hook shank, cover the mid section of the hook. |
 |
|
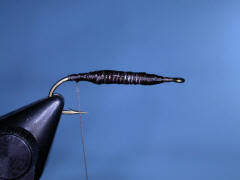
3 – Cover the lead wire with the working thread,
building a ramp on each side of the lead in the process. The thread ramp
will facilitate the body material going on smoothly. Bring the thread to
the area above the barb, and tie a half hitch. Cover the thread with
Dave’s Fleximent. This will lock everything in place, and provide a good
surface to construct the rest of the fly. |
 |
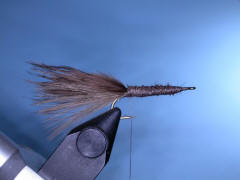
| 4 – Tie in a tail of marabou the
length of the hook shank. Trim off the excess marabou, and tie down the
loose ends. If you would like the body of the fly to be a bit fuller,
extend the butt ends of the marabou up the shank, tie down, and trim off
at this point. Tie a half hitch. |
 |
|
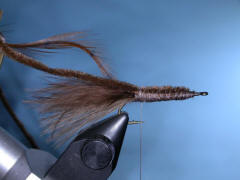
5 – Tie in the saddle hackle by the tip end, so when
palmered up the body, the shiny side will be toward the hook eye. Also
tie in the ultra chenille. Tie a half hitch. Place the tag ends of the
materials in the material holder, if your vice has one. |
 |
|
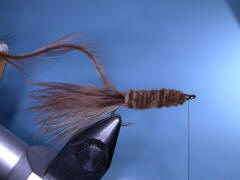
6 – Bring the working thread forward, and tie a half
hitch behind the hook eye. Lay the bobbin over the bobbin/thread holder,
if your vice has one. Now palmer the chenille forwards, forming the
body. Tie off, and snip off the excess chenille. Tie a half hitch. |
 |
|
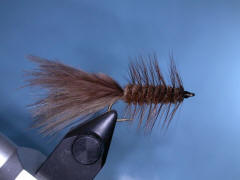
7 - Grab the loose end of the feather using the
hackle pliers. Palmer the feather forward, letting the stem slide
in-between the wraps of chenille. Tie off the end of the feather, and
cut off the tag end. Form a head, tie a couple of half hitches, and then
a whip finish. Snip off the working thread. Coat the head with head
cement. |
 |
© 2005 Robert R. Ireton, II
www.buckeyeflyfishers.com
Site designed and maintained by
Panfalone@fuse.net
|


