|
Fly of the Month Bob Ireton brings together his experience in fly fishing, aquatic entomology, and knowledge of fly tying techniques and materials, to design and tie durable and effective flies. |

|
![]()
Volume 4, Issue 11 November
2003
![]()
TEENY NYMPH
Fly, Text, and Photography by Bob Ireton
Jim Teeny designed and made the first Teeny Nymph in 1962. This, and his other fly designs, are the only flies he fishes. Over the years, this fly has over 20 world records to its credit. That says a lot about this generic, easily tied wet fly. All Teeny Nymphs are tied with ring neck pheasant tail feather fibers. The original nymphs used only naturally colored feathers, but more recently, a variety of dyed feathers are being used.
Presentation is very important with this fly. Jim doesn't tie the fly with weight, but rather gets it deep using a sinking line. He feels that the fly looks more natural as it drifts in the current if it is not weighted, and I agree. I don't fish with weighted lines, but choose to add weight on the tippet about 8" above the fly. Use a dead-drift presentation with this fly. Teeny casts across stream or quartering upstream and makes one or more upstream mends to sink and keep the fly near the bottom.
Teeny has since started his own business, and developed some great fly lines, and developed other fly patterns using his personally designed hooks made for him by Eagle Claw.
MATERIALS
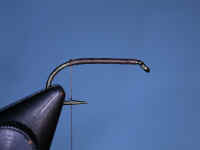
Hook - Eagle Claw Teeny custom
black, Daiichi 1120, Mustad 3399, or equivalent.
Size - 2-14.
Thread - 6/0 Brown.
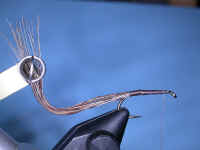
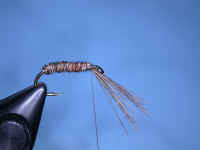
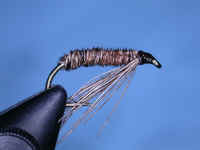
Body - Natural Ringneck Pheasant tail fibers.
Legs - Tips of fibers used for body.
TYING STEPS - click on pictures for larger view
![]()
Copyright © 1998 - thisyear The Buckeye United Fly Fishers, Inc. Cincinnati, OH 45242
The Buckeye United Fly Fishers, Inc is a non-profit corporation organized under section 501(c)(3) of the Internal Revenue Code, incorporated in the State of Ohio for the preservation, conservation and wise use of our fishing waters and game fish; and to assist in the protection and improvement of our natural resources
