|
Fly of the Month Bob Ireton brings together his experience in fly fishing, aquatic entomology, and knowledge of fly tying techniques and materials, to design and tie durable and effective flies. |

|
![]()
Volume 5, Issue 1
January 2004
![]()
STONEFLY NYMPH
Fly, Text, and Photography by Bob Ireton
Stoneflies inhabit only very clean, oxygenated water, and are excellent biotic indicators of water quality. Larval development usually takes from three months, to up to three years in the larger species, and involves from 12 to 22 or more molts to reach larval maturity. This means that there are always larva of different sizes in the water. There is close to 500 species in North America, and these nymphs usually measure 5-35 mm, and sometimes up to 60 mm, not including tails! Emergence of adults takes place at all times of the year, so as the nymphs migrate toward the dry land at water's edge, there is always activity going on, not to mention being swept off the rocks by the swift current.
When it comes to fishing in clean, cool, well-oxygenated streams, like your favorite trout stream, a stonefly nymph will work anytime! You can use this pattern as a base, and modify the size and color to match most any stonefly nymph.
MATERIALS
Hook - TMC 5263, Dai-Riki 710,
Daiichi 1720, Mustad 9672, Orvis 1526, or equivalent 3xl hook.
Size - 6 -16.
Thread - Uni-Black 3/0 & 6/0, 8/0 for smaller sizes.
Weight - Lead wire diameter of hook wire.
Tail - Black goose biots.
Abdomen - Black Body-Stretch material, size to match fly size.
Wing Case - Same as for abdomen.
Thorax - Black Stonefly Mottled Nymph Blend dubbing.
Eyes - Mono nymph barbell, size to match fly.
TYING STEPS - click on pictures for larger view
| 1 - Place the hook properly in the vice. I am using a size 14 for this fly. Pinch down or roll over the barb, if desired. Attach the 3/0 working thread behind the hook eye, and lay on a base rearward, stopping above the hook barb. A good base on a fly is like a good foundation for a new house. We all know what happens if we build a house on sand! Tie a half hitch. | 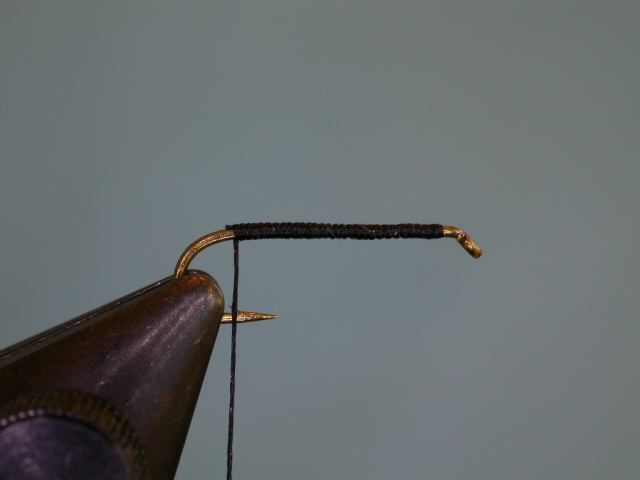 |
| 2 - Wrap on enough lead wire to cover just the middle half of the hook. We will see why in step four. | 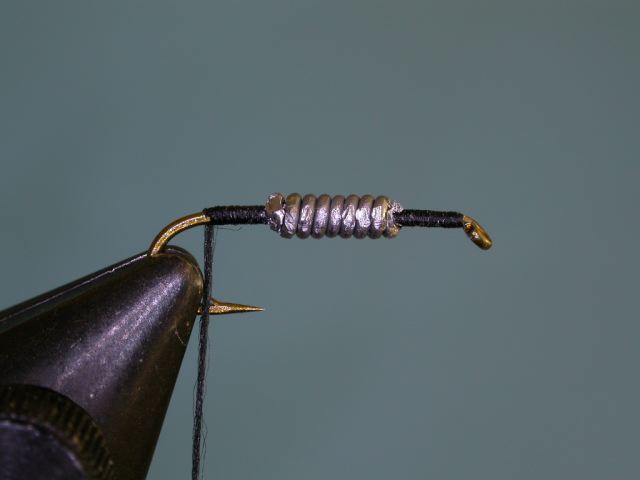 |
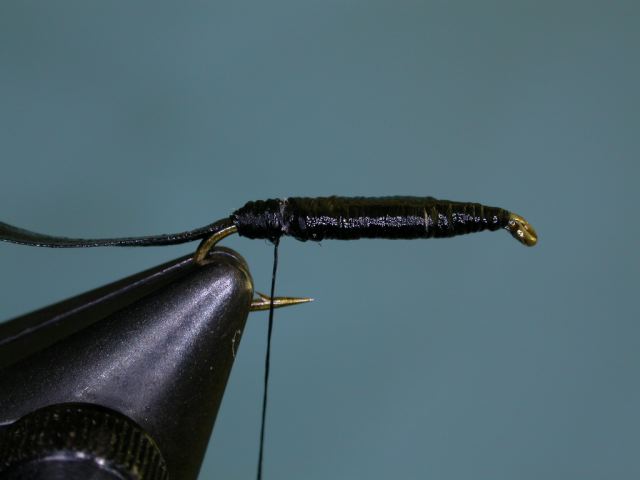
| 3 - Cover the lead with thread while forming a thread ramp on each end of the lead. Tie a smooth whip finish anywhere on the fly, and cut and remove the 3/0 thread. Note: Using 3/0 thread for the base, especially for larger flies, is faster, and does a smoother job. | 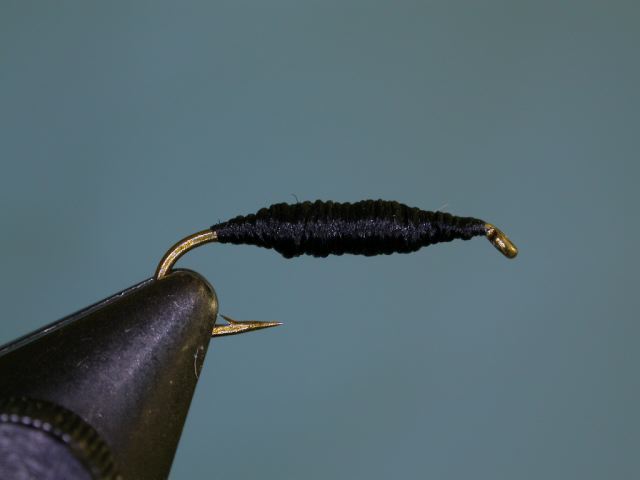 |
| 4 - With a pair of pliers that have flat, smooth blades, carefully flatten the thread covered lead wire. The thread keeps the wire smooth and compact. This will also cause the lead to lengthen. This is why we covered only the middle half of the hook shank in step two. Using Dave's Flexament, completely cover the thread covered lead. We now have a nice nymph shaped base! | 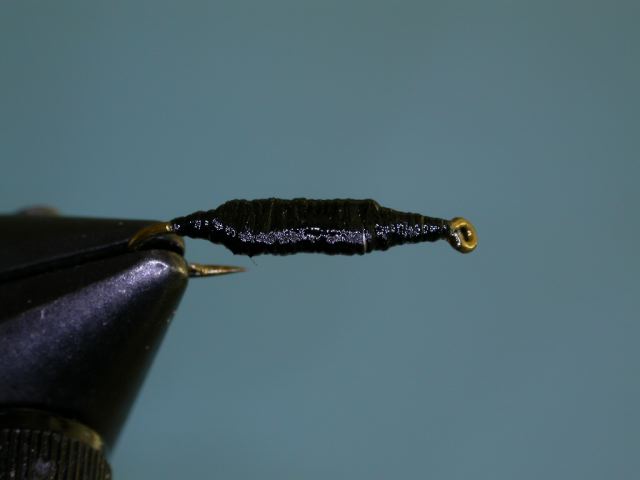 |
| 5 - Attach the 6/0 or 8/0 working thread at a point
above the barb. Take a piece of the Body-Flex, and trim one end for
easier attachment to the hook. Tie this on top of the hook shank, with
tag end facing rearward. With the working thread, form a thread ball
to cause the biots to flare out when tied in. Tie a half hitch.
|
 |
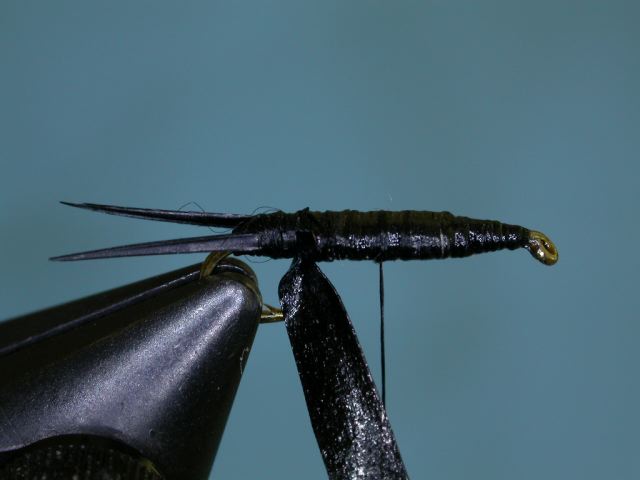
| 6 - Tie in the biots, one on each side of the hook
shank, making the length about half the length of the shank. The
thread ball will cause them to flare out. Now bring the Body Flex up
through and between the biots. Secure with a couple of wraps of
thread, and tie a half hitch. Bring working thread forward halfway,
and tie a half hitch.
|
 |
| 7 - Palmer the Body Stretch up and over the top of the fly, so the edge of the material is at the point that the biots show from beneath the body. Continue palmering forward to form a segmented looking body. At any spot past the half way point, tie off the body material, snip off and remove the excess, and tie a couple of half hitches. | 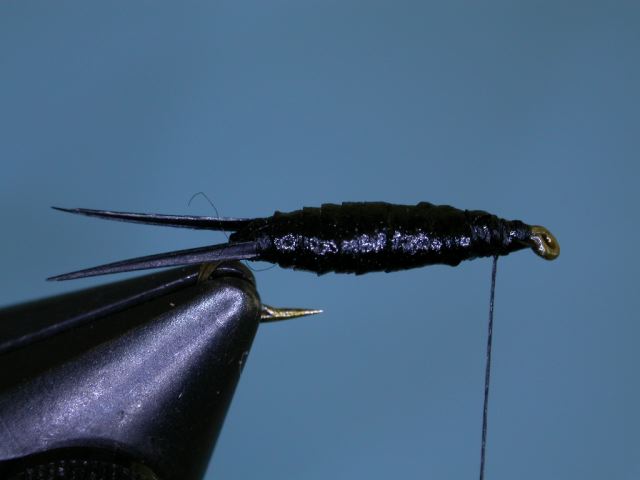 |
| 8 - Tie in a piece of the Body Stretch on the top of the fly, with the tag end laying rearward. You want the end of the wing case to be half way back. Tie a half hitch. | 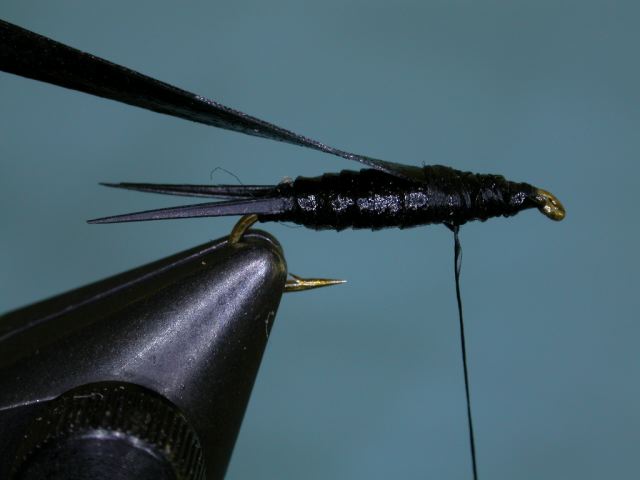 |
| 9 - Apply a little dubbing to the thread, and form this section of the thorax. Bring the Body Stretch over the dubbing, and tie off with a half hitch. | 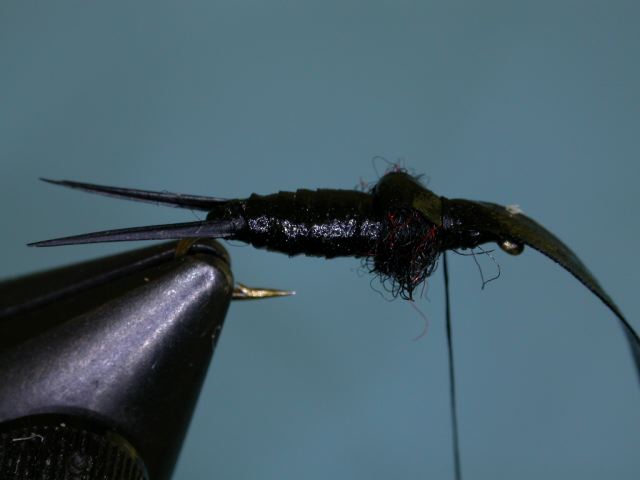 |
| 10 - Form another dubbed thorax section as the first, then bring the body material over this, and tie off with a half hitch. | 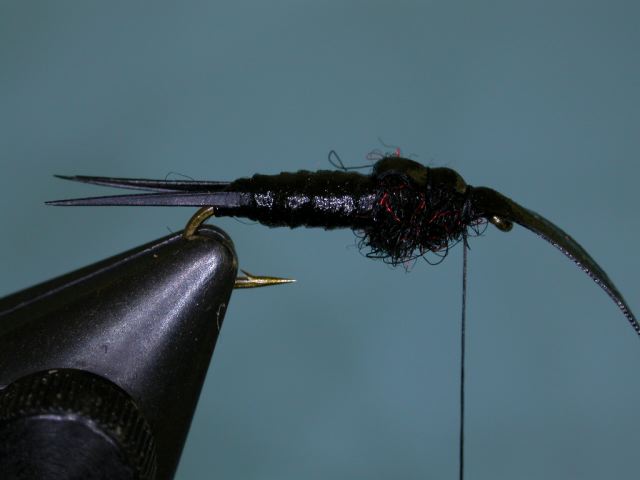 |
| 11 - Tie in a pair of mono eyes on top of the fly, resting on top of the tag end of Body Stretch. Secure with figure eight loops, and then a half hitch. | 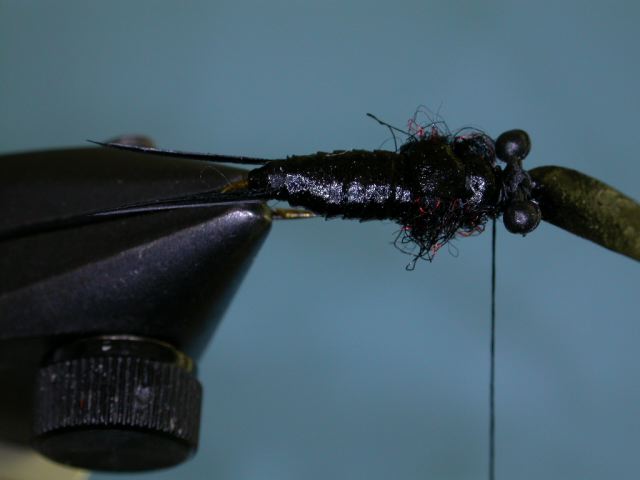 |
| 12 - Spin a little dubbing on the thread, and wind this around the eyes. Tie a half hitch behind the eyes. Fold back the body material, and tie off with a half hitch. With the Body Stretch, form a second wing case, and tie off securely, all behind the eyes. |  |
| 13 - Snip off and remove the excess Body Stretch, and tie a couple of half hitches, followed by a whip finish. Snip and remove working thread. Pick out some of the dubbing on each side, and do any last minute trimming, etc. Apply head cement to the thread. |  |
![]()
Copyright © 1998 - thisyear The Buckeye United Fly Fishers, Inc. Cincinnati, OH 45242
www.buckeyeflyfishers.comSite designed and maintained by Panfalone@fuse.net