|
Flies for All Fish Joe Cornwall has been fly fishing and tying flies and jigs for well over 30 years. He authored the book Fly fishing Warm Water Rivers ( www.flyfishohio.com ) . Joe is a member of the Outdoor Writers of America and the Outdoor Writers of Ohio. He won the 2004 OWO award for best outdoor magazine column for his work in Country Anglin’ Outdoor Guide. A smallmouth bass fanatic at heart, Joe is happy to fish for anything with fins. In this monthly column Joe will share the patterns he’s found to work best in our local waters and for our local game fish. |
|
![]()
Volume 7, Issue 5
May 2006
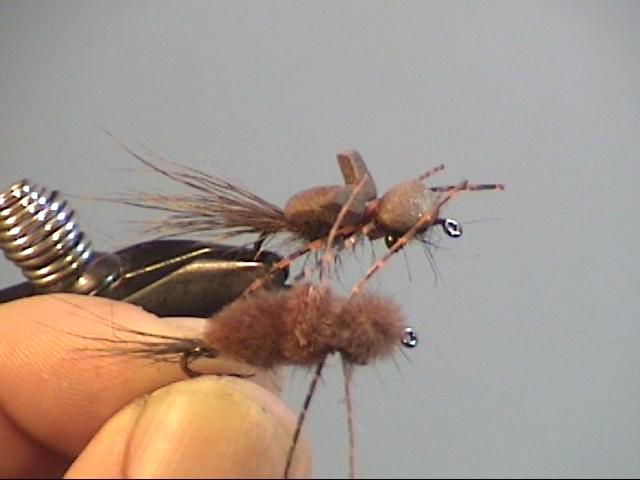
The Skip Morris Predator
Fly and Text by Joe Cornwall
Photography and Video Production by Jim StuardSkip Morris, originator of the Predator, had this to say about the fly in the excellent The Art of Tying the Bass Fly: “I developed the Morrisfoam Predator as a trout fly, and it’s proved itself there. When I finally gave it a chance with largemouth bass, it proved itself just as effective with them as it had with the trout. It is fished on a sinking line – the line finds the bottom while the fly (on an active retrieve) hovers just above the lake bed.” Right away you can tell this is a special fly. How many patterns do you know of that are tied from buoyant, floating materials and then fished on a sinking line?
The Predator is more than a trout or bass fly. It is an absolute addiction for panfish, especially large bluegills. I recommend fishing this fly in the manner prescribed by its originator; on a sinking line. While it is effective as a top-water bug, there are better, more effective patterns for that application. But on a sinking line, this is a monster! I fish the Predator from my canoe on most area lakes and ponds. I like to use an 8 ½ foot 5 weight fly rod with a full sinking, density compensated line. I make a long cast parallel to shore, then I put the rod in the holder and grab for a second rod that is rigged with either a popper or streamer. I let the Predator trail behind the slowly drifting canoe, or sometimes I let it sit on the bottom while I’m anchored. The buoyant fly will ride a foot or more off the bottom. It is an outstanding imitation of a dragon fly nymph, a key food for stillwater fishes.
Keep an eye on the rod! Takes on this fly are seldom subtle and you don’t want your fly rod heading over the gunnels of the boat! The rubber legs are always in motion and the fly is tossed about by the micro-currents in a very lifelike manner. White bass, crappie and big bluegill find it absolutely irresistible. Use a three to five foot length of 4lb test tippet material and tie the fly on using a non-slip mono loop knot for maximum life-like action.
If you haven’t tried fishing a floating fly on a sinking line, why not start this year. I’m sure you’ll be impressed by the results. And if you find yourself on a pond full of trout, remember that’s what this fly was designed for.
…click on picture for larger view
MATERIALS
Hook – Gamakatsu F14
Large Dry Fly Hook, size 6 to 12
Thread – Brown waxed (210 denier) – we use a larger thread to
keep from cutting the foam
Tail – Deer body
hair, color to match
Body – Squirrel fur dubbing
Shellback – Craft foam or furry foam, cut to a width not greater than the hook gape
Eyes – Mono eyes, medium or large depending on hook size
Head – Continuation of shellback foam
Wing Case –
Continuation of shellback foam
Legs – Sili Legs or small diameter round rubber legs
![]() click here for streaming video
click here for streaming video
You will need Real Player installed on your computer. You can download it from http://real.com
TYING STEPS …click on picture for larger view
|
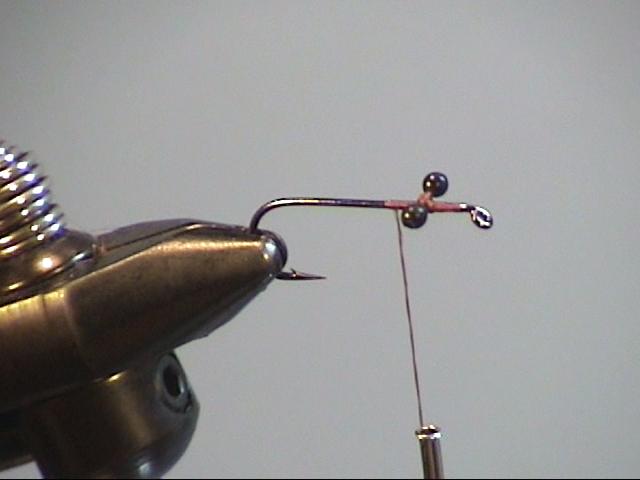
1. Mount the hook in the vise and start your thread just behind the eye. Here I’m using a size 6 Gamakatsu F14. You can use any 1 or 2xl dry fly hook. Attach the mono eyes using a crisscross wrap. |
|
|
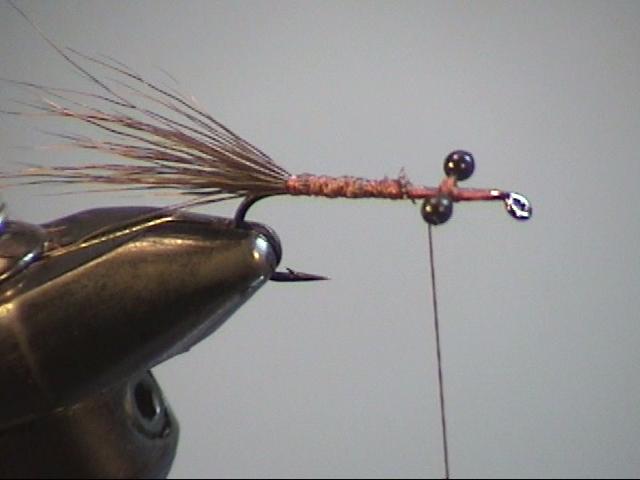
2. Cut and clean a small bunch of deer body hair. Measure so the tail extends past the bend of the hook a distance not greater than the hook gape. Tie in the tail starting right behind the eyes. Use progressively looser wraps as you approach the bend of the hook to keep the hair from flairing. |
|
|
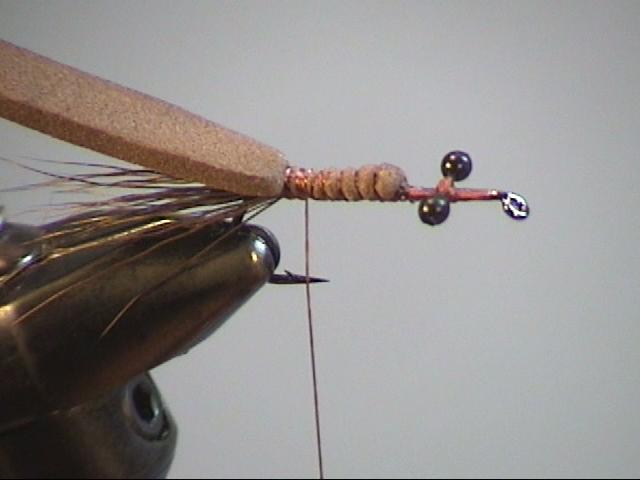
3. Cut a piece of craft foam or furry foam so it is just slightly narrower than the gape of the hook. Select a piece about three inches long and tie in one hook eye length behind the mono eyes. Bind the foam to a point over the barb of the hook. Use easy tension to keep from cutting the foam with the thread. |
|
|
4. Spin squirrel dubbing on the thread. Dub a fat body to the point where you tied in the foam. |
|
|
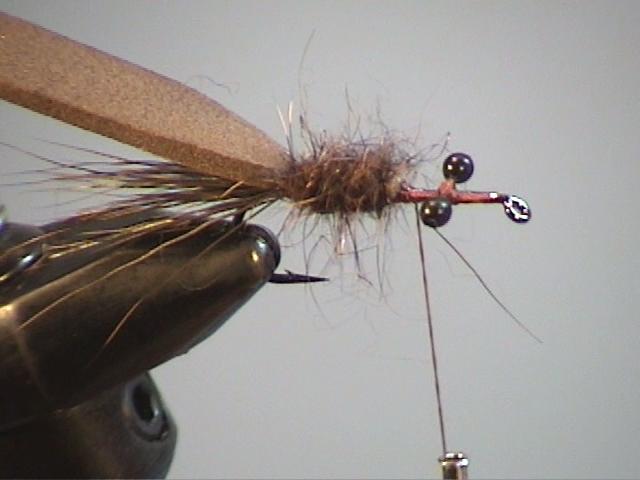
5. Bring the foam over the top of the body as a shell back. Using the tying thread, secure the foam over the tops of the mono eyes and compress the foam to make a sturdy foundation for the head of the fly. |
|
|
6. Dub a head for the fly around the eyes. You can use a darker color of dubbing, or the same color, depending on the effect you want to achieve. The head should be slightly smaller in diameter than the dubbed body. |
|
|
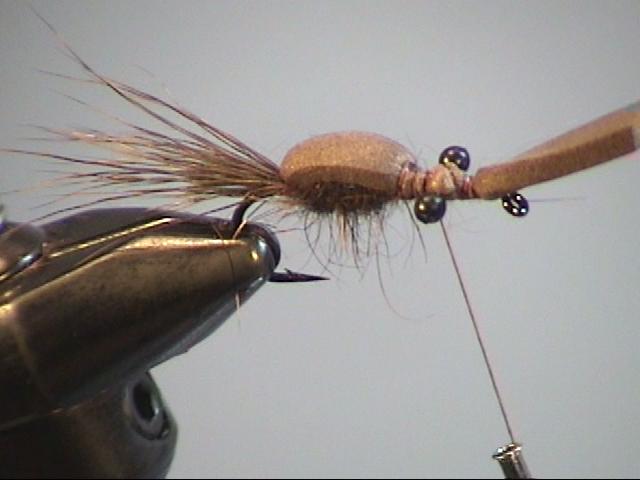
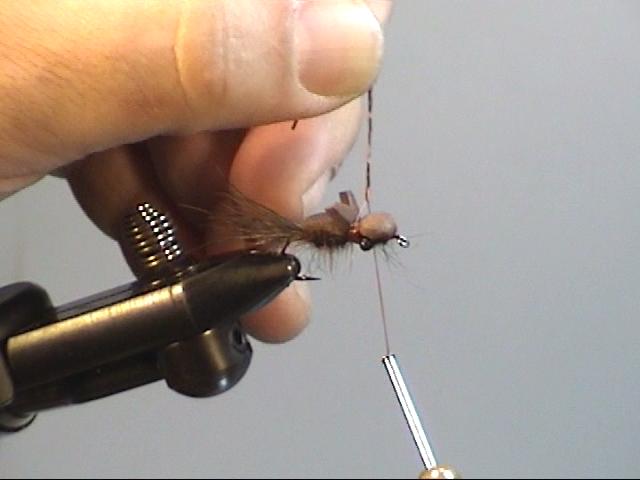
7. Pull the foam back over the dubbed head of the fly and secure with a waist of tying thread behind the eyes. Don’t use too much pressure on the tying thread; you don’t want to cut the foam. Use several wraps in order to make clean separation between the abdomen and the head. |
|
|
8. Tie in a pair of legs on each side of the fly. Use the “loop over” method of attaching the rubber or silicone legs. Trim the legs to length. |
|
|
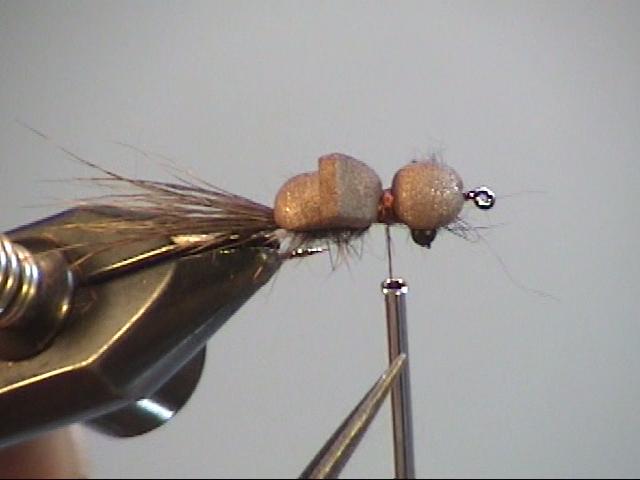
9. Whip finish using a hand whip technique. Finish the thread at the leg tie-in point. You can add a bit of super glue or head cement to seal the thread in place. |
|

Till next time, tight lines and gentle breezes…