|
Fly of the Month Bob Ireton brings together his experience in fly fishing, aquatic entomology, and knowledge of fly tying techniques and materials, to design and tie durable and effective flies. |

|
![]()
Volume 5, Issue 4
APRIL 2004
![]()
PINK LADY
Fly, Text, and Photography by Bob Ireton
I like to think about the hatch and egg laying of a 'pinkish' mayfly I have observed while fishing in the streams of the Southern Appalachian Mountains. Although the body is not a dark pink, it does really catch your eye. When the females are laying eggs, the orange egg sacs really stand out in the pale pink abdomen. The hatch and egg laying occurs right at dusk, so if you leave the stream early, you may never see this hatch. I have observed this mayfly in the latter part of April, and in May. I can't say how long the season is for this species. I understand this mayfly hatch is pretty widespread across the Great Smoky Mountain National Park and adjoining waters of Tennessee and North Carolina.
There are several 'Pink' fly patterns out there. Pink Cahill. Pink Hendrickson. Pink Lady. All the patterns aren't really that 'pink', but 'pinkish' to varying degrees. I'm sure this one should cover them all. If you tie some orange dubbing in the tail section of the abdomen, you will have a nice 'Female Pink Lady'.
MATERIALS
Hook - TMC 100, Dai-Riki 300,
Daiichi 1100, Mustad 94840, Orvis 1509, or any standard dry
fly hook.
Size - 12-14.
Thread - UNI Rusty Dun 6/0 or 8/0.
Tail - Ginger spade hackle fibers.
Wing - Dun hen neck hackle tips.
Body - Fine and Dry dubbing, Hendrickson pink.
Hackle - Barred ginger dry fly hackle feather.
TYING STEPS - click on pictures for larger view
| 1 - Place the hook properly in the vice. I am using a TMC 100 size 14 for this fly. Connect the thread behind the hook eye, and lay on a thread base. While wrapping the thread base, if you hold the tag end of the thread at a 45 degree angle, the working thread will be guided snugly against the previous wrap or thread. | 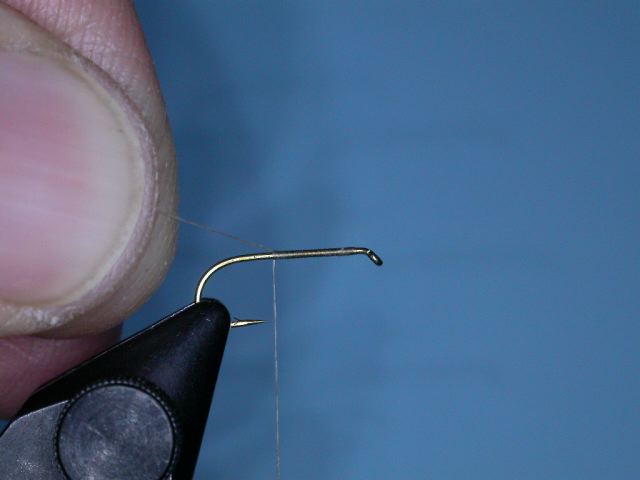 |
| 2 - Continue palmering the thread base rearward, stopping when the working thread is at the hook barb. Tie a half hitch. | 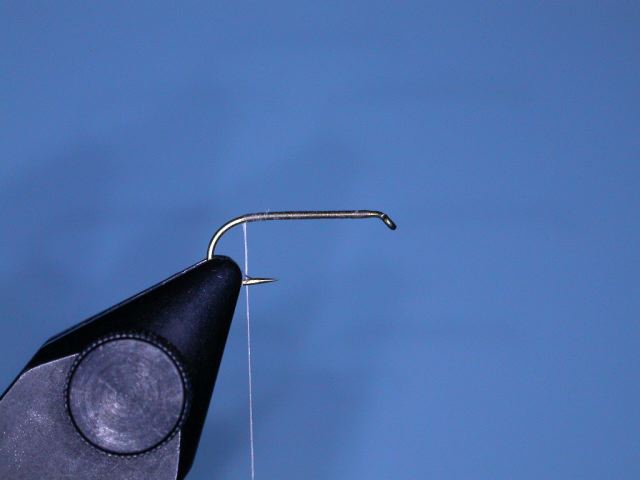 |
| 3 - Select a spade feather from the side of a rooster neck. Remove some fibers from this feather, and adjust the fiber tips so they are even. Lay a clump of fibers on top of the hook shank, adjust the length of the tail to be the length of the hook shank, and tie in with a couple of soft loops. Make any adjustments to the length of the tail, then finish tying down the tail fibers. Snip off the butt ends of the fibers, and continue to tie down the fiber butts. Bring the thread forward to a point 1/4 hook shank length behind hook eye. Tie a half hitch. | 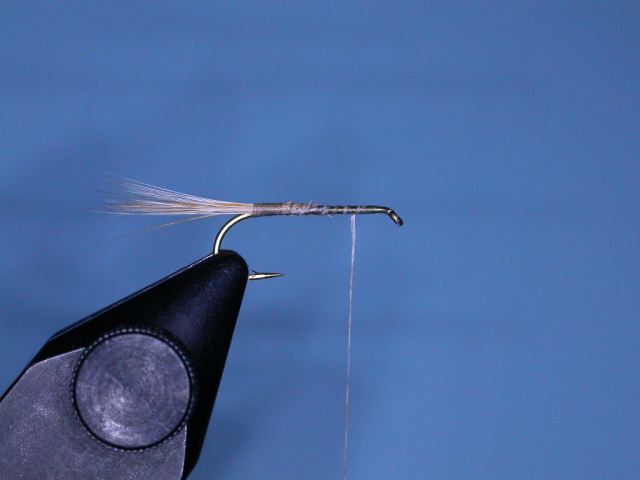 |
| 4 - Select a pair of hen neck hackle feathers. Hold the feathers so the natural curve causes the tips to curve outward from each other. Lay the pair of feathers on top of the hook shank with the tips facing toward the hook eye end of the hook. The height of the wings should be the length of the hook shank. Using soft loops, attach the feathers to the top of the hook shank so the wings are attached 1/4 hook shank length behind the hook eye. Make any final adjustments to the wings, and then tie down securely. Cut and remove the unused portion of the feather. | 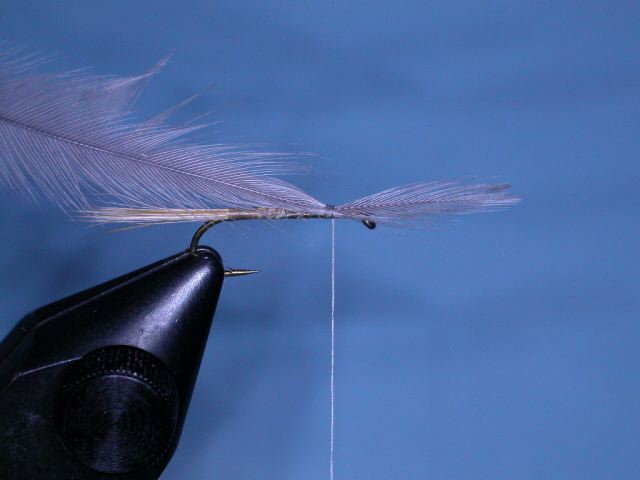 |
| 5 - Using your thumb and forefinger, hold the wings upright, and lock in this position with thread wraps in front of the wings. Then remove your fingers, and separate the wings with figure eight wraps. Bring the thread rearward with well spaced wraps, stopping at the hook barb. Tie a half hitch. |  |
| 6 - Spin a small amount of dubbing on the working thread. Use a very thin coating of dubbing wax on the thread, if needed, before you spin on the dubbing. Don't use too much dubbing. It is much easier to add dubbing, than to try to remove excess! Also, always spin the dubbing on the thread in the same direction. | 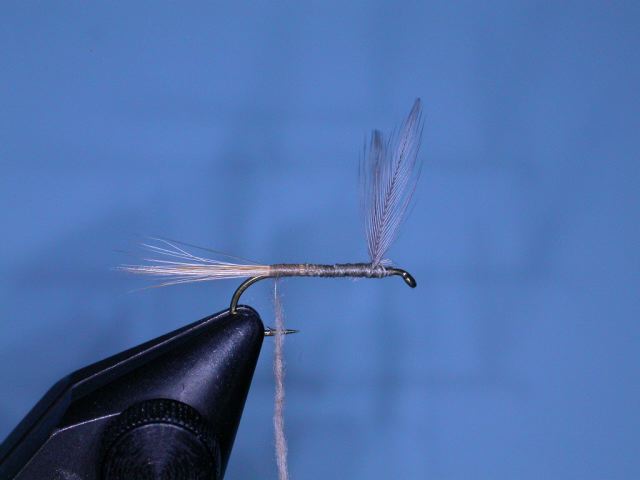 |
| 7 - Palmer the dubbing forward to form a slightly tapered body. Stop just behind the wing, tie off the body, and tie a half hitch. | 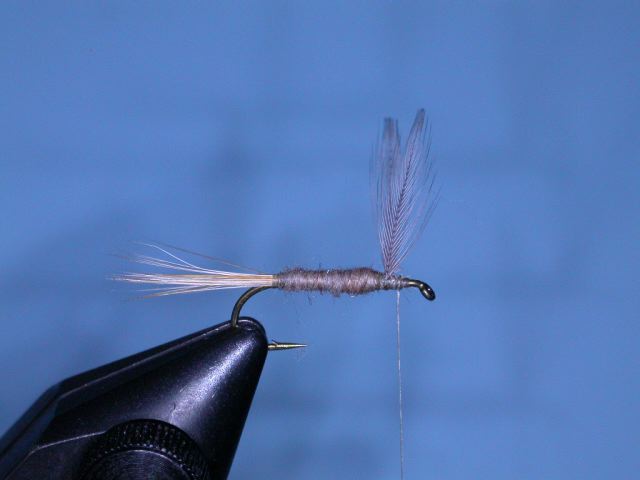 |
| 8 - Select a nice rooster dry fly hackle feather. Using a hackle gauge, measure the fibers by bending the shaft over the peg, and check to see that the fiber length is the correct length. This example is a size 14. | 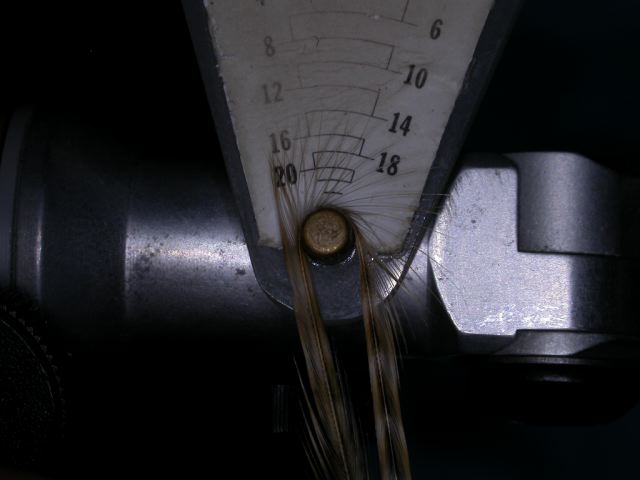 |
| 9 - Prepare the hackle feather by cutting off the lower section of feather with the webbing, and snipping off the first quarter inch of fibers on both sides of the feather shaft on the bottom of the section you will be using for the collar. Hold this along side the fly, at the wing location, and tie in behind and in front of the wing, so when you palmer the hackle, the shiny side will be facing forward. With the thread in front of the wing, tie a half hitch. |  |
| 10 - Palmer the hackle up over the top of the fly, away from you. Put 3-4 wraps behind the wing, then bring the hackle under the fly, and palmer 3-4 wraps of hackle in front of the wing. Tie off with several wraps of the working thread. | 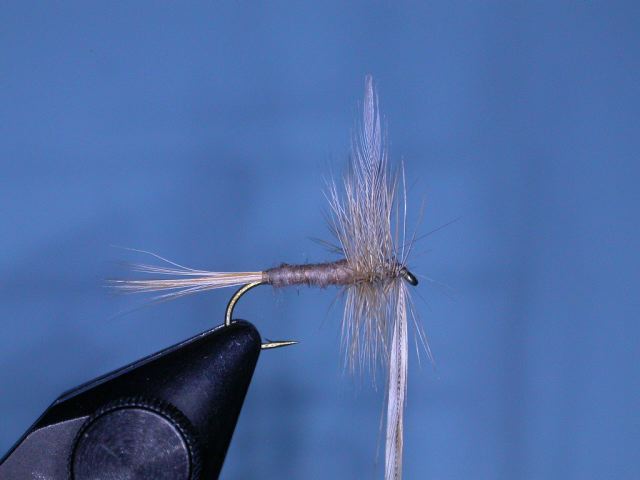 |
| 11 - Cut off the excess hackle feather. Form a head with the thread. Tie a half hitch, and a whip finish. With your bodkin, apply some head cement to the head. | 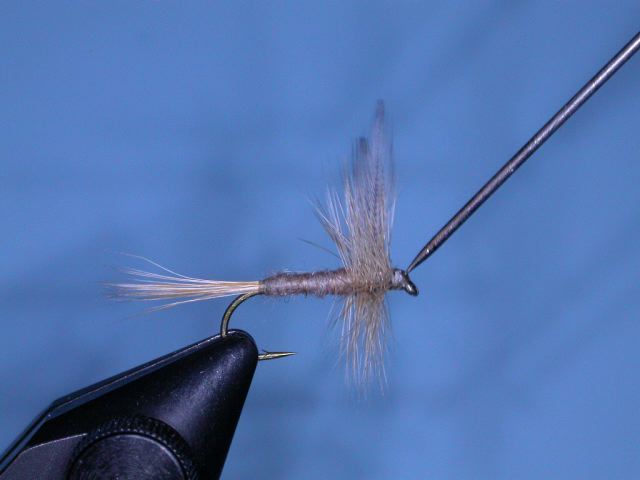 |
| 12 - The finished 'Pink Lady' dry fly. | 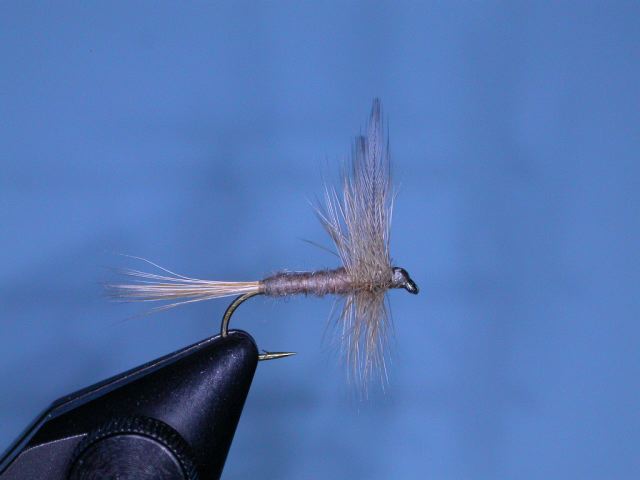 |
© 2004 Robert R. Ireton, II
![]()
Copyright © 1998 - thisyear The Buckeye United Fly Fishers, Inc. Cincinnati, OH 45242
www.buckeyeflyfishers.comSite designed and maintained by Panfalone@fuse.net