|
Fly of
the Month
Bob Ireton brings together his
experience in fly fishing, aquatic entomology, and knowledge of fly
tying techniques and materials, to design and tie durable and
effective flies.
|

|

Volume 5, Issue 10
October 2004
MAGGOT
Fly, Text, and Photography by Bob
Ireton
If you have fished very
long, you no doubt have come upon a rotting animal in the stream or
lake. Seems like a wounded or injured animal instinctively goes to
water. Could even be a dead fish! Regardless of how, or why they get
there, once they die, the flies, and other insects, will lay their eggs
in the rotting carcass. The eggs hatch into larva, sometimes called
maggots. Some of these maggots will wind up in the water, and the fish,
and other stream dwellers, will eat them. Tie a few flies to ‘match this
hatch’, and you will be ready the next time you are in this situation!
MATERIALS
Hook – Daiichi
1130, TMC 2487, Orvis 1639, Mustad 80250, or most any Caddis or Scud
hook.
Size – 10-18.
Thread – UNI 6/0 or 8/0, in white or cream.
Weight – Lead wire, or non-lead substitute, the diameter of the
hook wire.
Rib – 5X tippet material.
Back – Natural latex, or equivalent.
Body – Cream SLF dubbing.
Head – Brown permanent marker.
TYING STEPS - click on
pictures for larger view
|
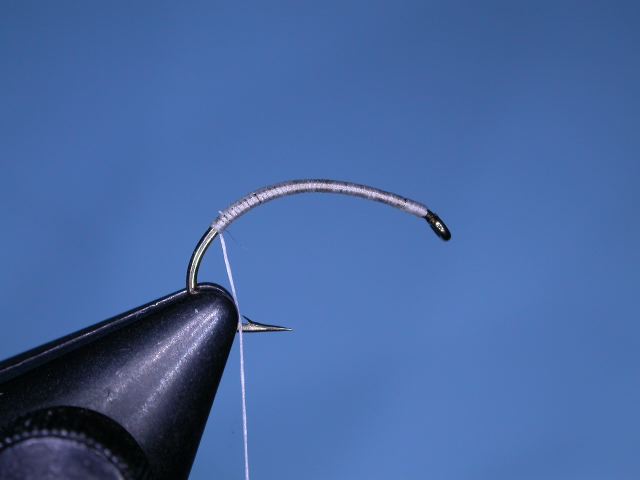
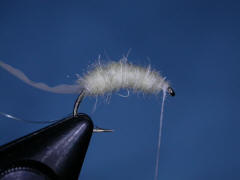
1 – Mash down
the barb, if you like, and insert the hook properly in the vice. Attach
the working thread behind the hook eye, and lay on a good thread base.
Stop somewhere along the bend of the hook, and tie a half hitch. This is
a generic Maggot, and since they come in different sizes, you don’t have
to be exact. I am using a Daiichi 1130, size 12, for this fly. |
 |
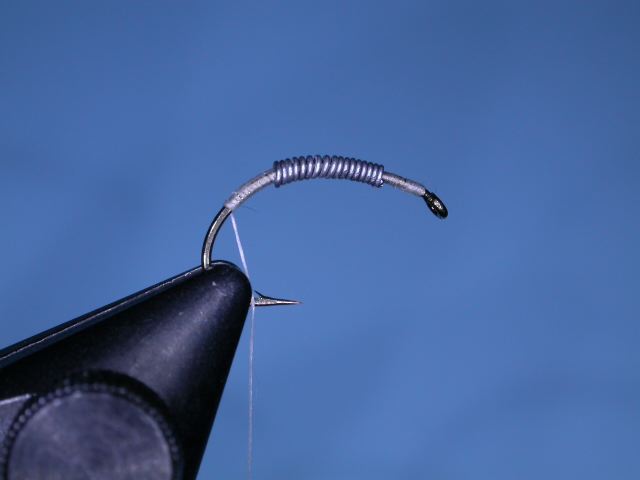
| 2 –
Using lead wire, or substitute, cover the
mid half, or so, with tight wraps. |
 |
|
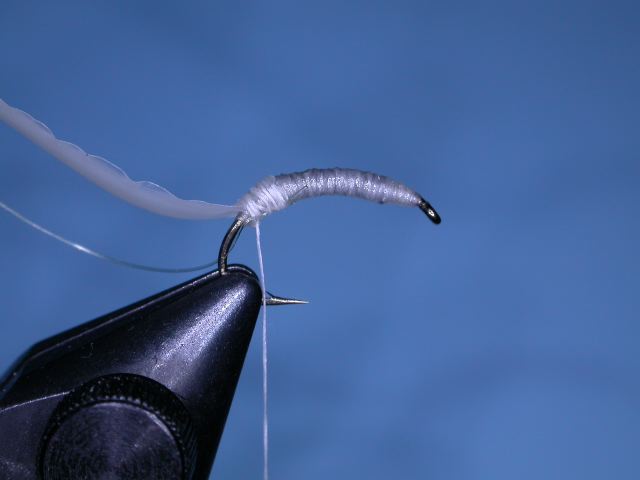
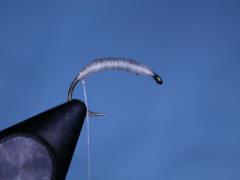
3 – Build a
thread ramp at both ends of the lead wire, then cover the lead. Bring
the thread to the rear of the fly, and tie a half hitch. Cover the
thread with Dave’s Flexament, or head cement. |
 |
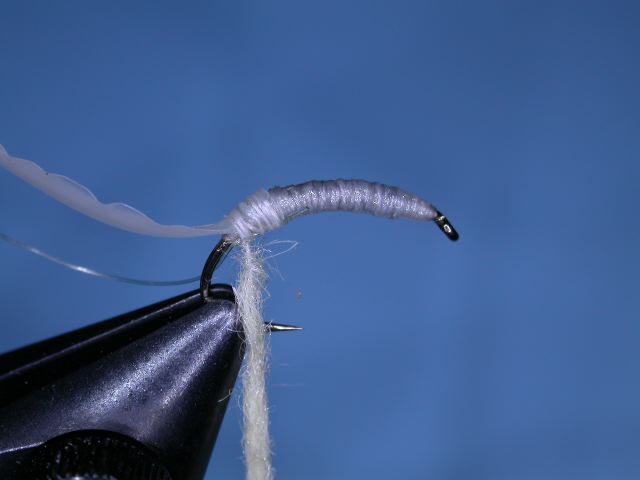
| 4 – Tie in the 5X
tippet for the rib. Then tie in the material for the back. Even out the
thread wraps, and tie a half hitch. |
 |
|
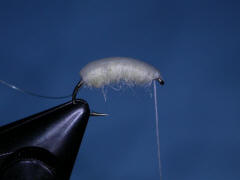
5 – Apply the
dubbing to the working thread, and spin it in one direction between your
thumb and forefinger, to form the dubbing around the working thread. |
 |
|
6 – Palmer the
dubbing rope forward to form a body. If your first dubbing rope is too
short, just add more dubbing to the thread until the body is complete.
When you are close to the head, pinch off any extra dubbing. Make a
couple of wraps with the thread, and tie a half hitch. |
 |
|
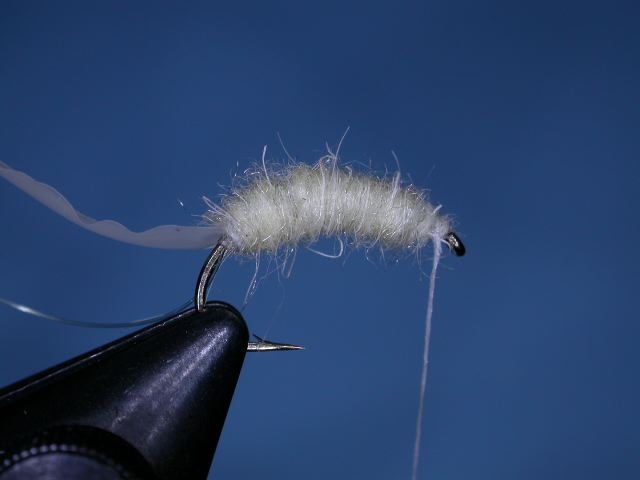
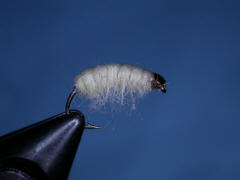
7 – Pull the
back material forward, over the top of the body. While keeping some
tension on the material, tie in with several tight wraps of thread. Snip
off any excess back material. Do a couple more wraps of thread, and tie
a half hitch. |
 |
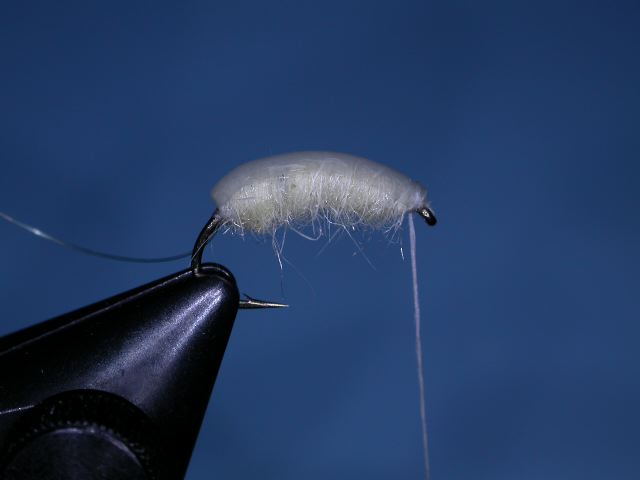
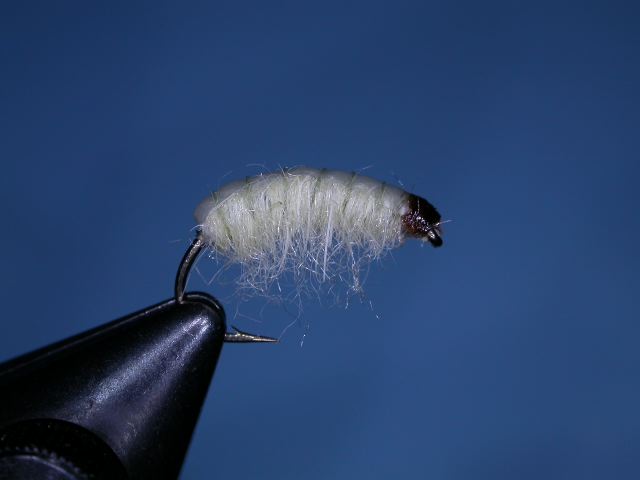
| 8 – Hang the working
thread over the thread holder, and palmer the tippet material forward to
form the segments. Tie off with the working thread, and cut off any
excess ribbing. Form a head with the thread, tie a couple of half
hitches, then a whip finish. Snip off the working thread. Color the head
with the permanent marker. Tease out some of the dubbing on the
underside of the body. Now apply some head cement. |
 |
© 2004 Robert R. Ireton, II
<
www.buckeyeflyfishers.com
Site designed and maintained by
Panfalone@fuse.net
|