|
Fly of
the Month
Bob Ireton brings together his
experience in fly fishing, aquatic entomology, and knowledge of fly
tying techniques and materials, to design and tie durable and
effective flies.
|
|

Volume 5, Issue 8
August 2004
MADAME X
Fly, Text, and Photography by Bob
Ireton
This pattern resembles a hopper or
stonefly, but also can be a searching fly. It is especially effective
anytime hoppers are on the water. It lands with a splat, floats with the
body in the surface film, and we know how rubber legs attract fish! Use
the MADAME X for trout, bass, and pan fish.
MATERIALS
Hook – TMC 5263, Dai-Riki 710,
Daiichi 1720, Orvis 1526, Mustad9672, or any hook with a 3xl shank.
Size – 6-12.
Thread – Kevlar, or any strong thread, color to match materials.
Tail – Natural deer body hair.
Body – Yellow poly yarn.
Head – Natural deer body hair, tied ‘bullet head’ style.
Wing – Tips of the natural deer body hair tied reverse style from
the head material.
Legs – White round rubber legs.
MATERIALS
Hook – Daiichi 1720, Mustad 9672,
Dai-Riki 710, Orvis 1520, or equivalent streamer hook.
Size – 10-12.
Thread – 6/0 Chartreuse.
Weight – Lead wire.
Body – Fluorescent chartreuse chenille.
TYING STEPS - click on
pictures for larger view
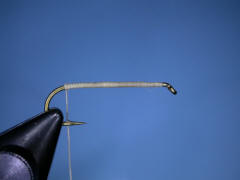
| 1 – Place the hook properly
in the vice. For this fly, I am using a size 10 TMC 5263. Flatten or
roll over the barb, if desired. Recommended on hooks with large barbs.
Attach the working thread behind the hook eye, and lay on a thread base
using close, tight wraps. Stop above the barb, and tie a half hitch. |
 |
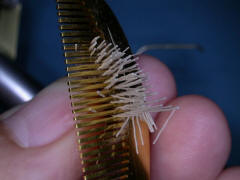
| 2 – Snip a small clump of
the deer body hair. Body hair is somewhat hollow, so it will float. Hair
from the tail is solid, and will sink. Hold the hair by the mid section,
and using a small comb or bodkin point, brush or pick out the underfur.
This will enable the hair to be stacked successfully. |
 |
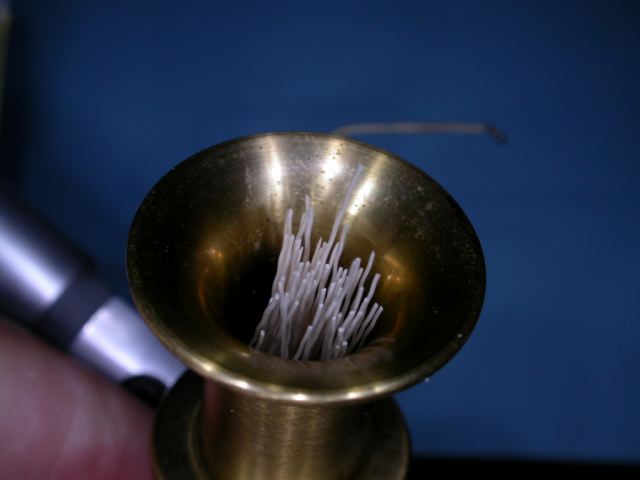
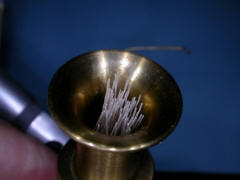
| 3 – Drop the deer hair ‘tip
first’ into the stacker. Now tap the base of the stacker several times
on a flat, solid surface. |
 |
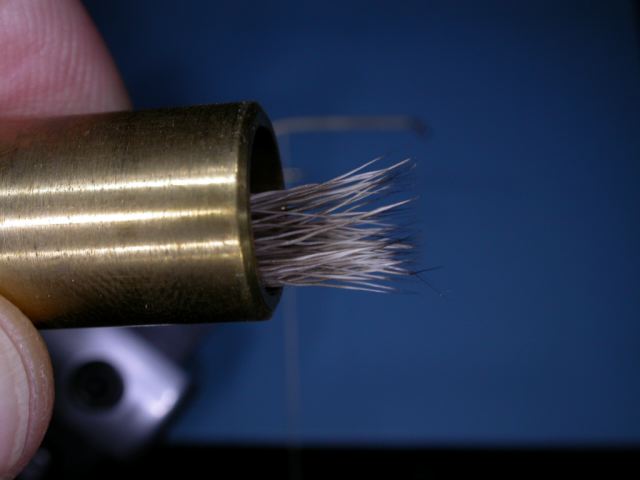
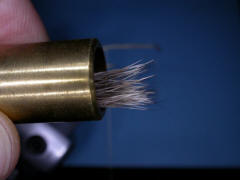
| 4 – Turn the stacker to the
horizontal position. Carefully remove the tube from the base. The tips
of the hair should be fairly even. Grasp the hair by the tips, and
carefully remove the hair from the stacker. |
 |
| 5 – Holding the deer hair by
the tips, position the hair on top of the hook shank, with the tips
extending rearward past the bend approximately half the length of the
hook shank. Anywhere between one fourth to one half should work for the
tail length. At the location above the barb, secure the hair with a
couple of soft loops. When the tail looks positioned where you want it,
add several more loops as you work the thread forward. Each wrap of
thread should be a little tighter than the last. Snip off the butts of
the deer hair, and finish covering the butts of the deer hair with the
thread. Tie a half hitch. |
 |
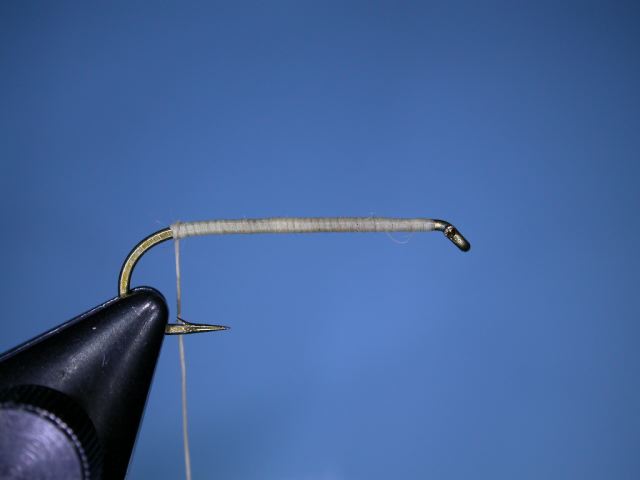
6 – Attach the poly yarn
several hook eye spaces back, and secure rearward, stopping above the
barb. Starting the yarn near the eye helps to build up the body. Bring
the working thread forward to the yarn tie in point, and tie a half
hitch.
|
 |
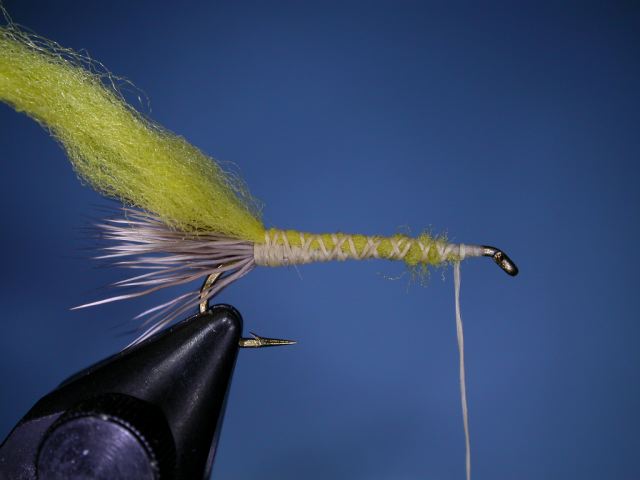
| 7 – Twist the yarn into a
tight rope, and palmer it forward in close loops to form a body that has
the illusion of being somewhat segmented. Secure the body before you
release the tension on the yarn. Snip off the unused yarn, and after
covering the ends of the yarn with thread wraps, tie a half hitch. |
 |
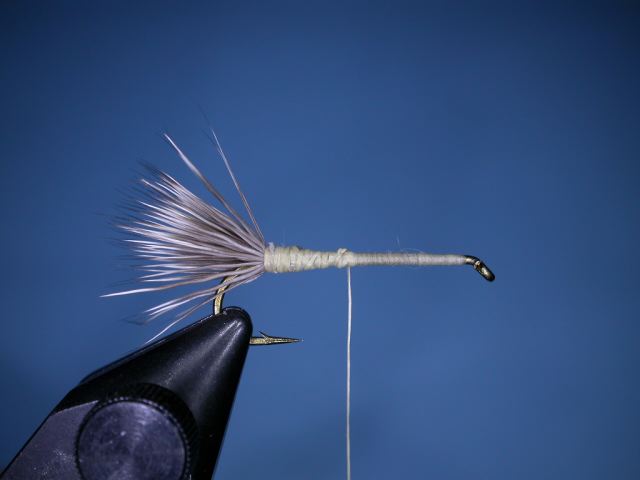
| 8 – Snip a larger, longer
bunch of the deer body hair for the wing/head. As with the tail, remove
the underfur, and stack the hair so the tips are even. Measure the hair
from the tips, and make it 1.5 times the length of the entire hook. Snip
off the butts at this length. Position the hair on top of the hook shank
with the tips extending forward of the hook eye. With the butts of the
deer hair against the body, secure the hair with several wraps of
thread. This step is harder than it looks. Just be careful and patient!
When you have it looking right, tie a couple of half hitches |
 |
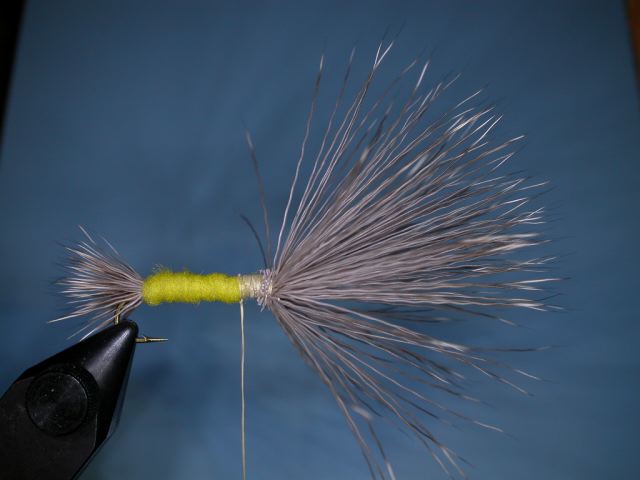
9 – Form the deer hair into
a compact bundle with your fingers, and lift it up and over the hook eye
and over the back of the fly. Make sure the hook eye is exposed. Do any
adjustments needed, and form the head by securing the hair with several
loops of thread. The head should be at least to where the body begins.
Tie a couple of half hitches. Cut two pieces of rubber legs about twice
the hook shank length. Secure one on each side so the rear leg is
approximately the length of the wing. Tie a half hitch, then a whip
finish . Snip off the working thread. Put a coat of head cement on the
thread and the head.
|
 |
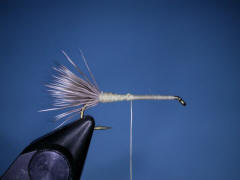
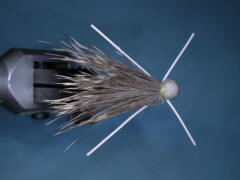
| 10 – Looking at the fly from
above, we see where the X in the name comes from. |
 |
© 2004 Robert R. Ireton, II
www.buckeyeflyfishers.com
Site designed and maintained by
Panfalone@fuse.net
|