|
Fly of
the Month
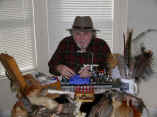
Bob Ireton brings together his
experience in fly fishing, aquatic entomology, and knowledge of fly
tying techniques and materials, to design and tie durable and
effective flies.
|
|

Volume 4, Issue 12 December
2003

HENDRICKSON COMPARA-DUN
Fly, Text, and Photography by Bob Ireton
The Compara-dun fly nicely imitates the
silhouette of a Mayfly dun in the surface film. They float well even on
moderately brisk water, and are visible, though they ride low in the
water. Being in the surface film, as opposed to riding high on hackle, the
fly looks like it is crippled, or dying, and very vulnerable. This will
entice even a wary, selective wild trout.
Al Caucci developed the Compara-dun in the
nineteen sixties. After meeting Bob Nastasi, they went on to develop the
Compara-nymph, emerger, and spinner around nineteen seventy. They wrote
several books, and do fishing instruction.
MATERIALS
Hook - TMC 100, Daiichi 1100, Dai-Riki
300, Mustad 94840, Orvis 1509.
Size - 14
Thread - 6/0 Tan.
Wing - Natural deer hair.
Tail - Dun tailing fibers.
Body - Tan dry fly dubbing.
TYING STEPS - click on
pictures for larger view
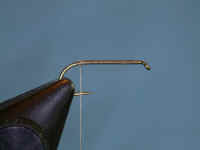
| 1 - Place the hook properly
in the vice, and pinch down, or roll over the barb, if desired. Attach
the working thread about a hook eye space behind the eye of the hook.
Using close, tight wraps, lay on a thread base rearward, stopping
above the barb. Tie a half hitch. |
 |
|
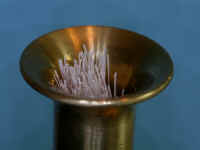
2 - Cut a bunch of fine, straight deer
hair from the hide, and comb out all the guard hair. The amount of
hair for the wing depends a lot on personal preference, and how smooth
the water will be where you will use this fly. As you will be using
just the very ends of the hair, the main bunch of hair will appear
much thicker than what you think you will need. Look ahead on the
pictures, and you will see what I mean. Put the deer hair in a
stacker, tips down, and tap the stacker on a firm surface to align the
tips of the hair. |
 |
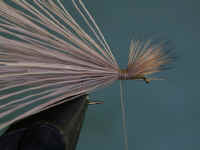
| 3 - Remove the hair from the
stacker, and lay the bunch of stacked hair on top of the hook with the
tips facing toward the eye. The wing should be as high as the hook
shank is long, and located 1/4 the distance of the hook shank, behind
the eye. Tie the hair in at this location using a soft loop. Add a
couple more wraps of thread, increasing pressure as you do this. Be
sure to keep the hair on top of the hook. The pressure will cause the
hair to flare. If the hair looks positioned correctly, wrap several
more wraps of thread rearward, increasing pressure as you go. Tie a
half hitch. |
 |
| 4 - Trim the butt ends of
the deer hair, cutting so the ends are at a slant rearward. Cover
these butts with thread, forming a tapered base for the dubbing body.
Bring thread to above barb, and tie a half hitch. |
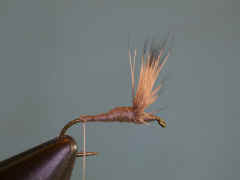 |
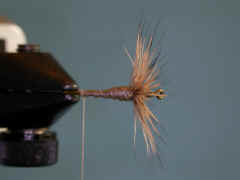
| 5 - Using your fingers,
bodkin, or whatever helps, work the deer hair tips into an arc of
evenly spaced fibers. When the arc of hair is around 160 to 180
degrees, you have it. Now bring the thread in front of the hair, and
build a ramp of thread in front of the hair to prop and hold it
upright. Tie a half hitch. This picture shows this from above. |
 |
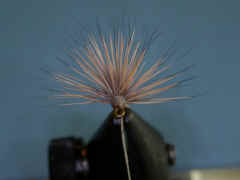
| 6 - This is a view from the
front of the fly. Notice the short, black tips of the hair, and how
these tips are evenly spaced. |
 |
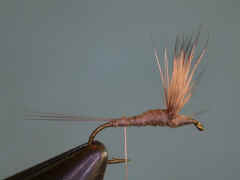
| 7 - Lay the tailing fibers
on the top of the hook, points facing rearward. The tail should be the
length of the hook shank. Tie in the fibers, spreading them out
slightly. Trim off the tailing fiber butts, and tie a half hitch. |
 |
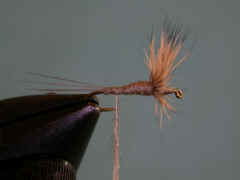
| 8 - Spin a small amount of
dubbing on the thread for the body. It is easy to use too much, so be
aware of this. |
 |
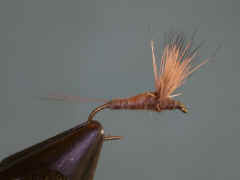
| 9 - Palmer the dubbing from
the base of the tail, forward, to build a body. When you get to the
wing, just go under it, and dub in front of the wing. Tie a head, a
couple of half hitches, and a nice whip finish. Snip off the working
thread, and apply a small amount of head cement to the thread. |
 |
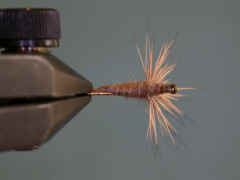
| 10 - This is a view from the
bottom. The fish will see the fly like this. |
 |
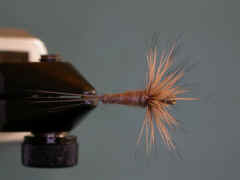
| 11 - Here is a view looking
down on the fly. |
 |

www.buckeyeflyfishers.com
Site designed and maintained by
Panfalone@fuse.net
|

![]()
![]()
![]()


