|
Fly of the Month Bob Ireton brings together his experience in fly fishing, aquatic entomology, and knowledge of fly tying techniques and materials, to design and tie durable and effective flies. |

|
![]()
Volume 5, Issue 5
May 2004
![]()
BROWN SPIDER
Fly, Text, and Photography by Bob Ireton
When we think of flies known as ‘Terrestrials’ we usually think of
grasshoppers, crickets, inchworms, beetles, and such. A fly that is
sometimes overlooked is the ‘Spider’! In fact, this fly can be difficult
to find in a fly fishing store, or a mail order catalog. But the spider is
really easy to tie, especially if you buy the pre-formed bodies, which are
usually available. These bodies are made in several colors and sizes, so
let your creativity have free reign!
In warmer weather, spiders are found around all bodies of water. In fact,
some actually get into the water. Otherwise, they can be blown into the
water, etc. However they get there, the fish are eager to make a meal of
them! The spider fly is usually most effective when fished near the
water’s edge, but I have had great success with them at any distance in
most ponds, lakes, and streams. This is a fly I suggest you always have in
your fly box!
MATERIALS
Hook - TMC 100, Dai-Riki 300,
Daiichi 1100, Mustad 94840, Orvis 1509, or any lightweight dry fly hook.
Size - Shank length to match the foam body.
Thread – Brown Uni 6/0 or equivalent.
Body – Pre-formed brown foam spider body the same length as the
hook shank.
Legs – Brown Fexli-Floss, or equivalent, diameter to match body
size.
TYING STEPS - click on pictures for larger view
| 1 – Spiders come in all sizes, so pick a hook size to
match the size body you want. A good guideline is the foam body and hook
shank should be close to equal in length. For this fly, I am using a TMC
100, size 10. Place the hook properly in the vice. A hook with a
‘micro-barb’ may be fine, but if your hook has an ‘anchor’ for a barb,
please consider mashing it down, or at least ‘rolling over’ the barb.
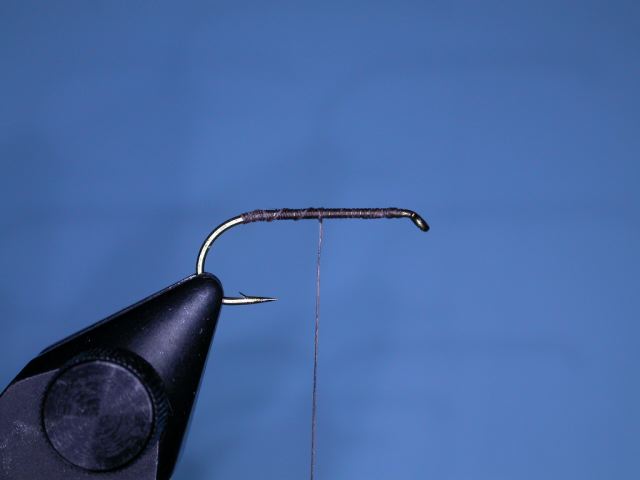
Attach the working thread behind the eye of the hook, and lay on a
thread base rearward, stopping above the barb. With well-spaced wraps,
bring the thread back to mid shank, and tie a half hitch. |
 |
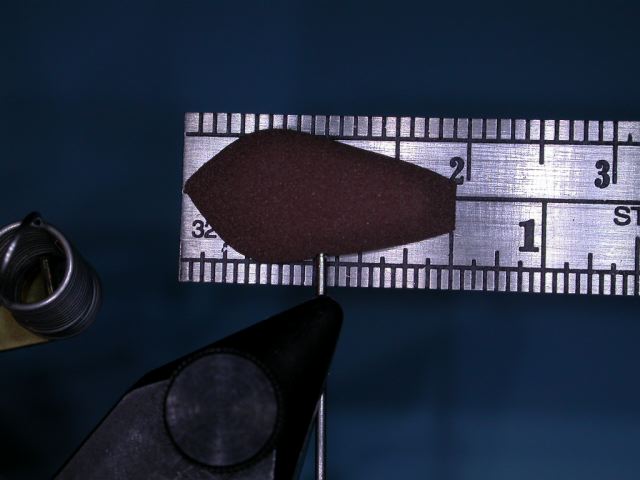
| 2 – Select a pre-formed ‘spider body’. For this fly, I
am using a size ‘medium’ that measures 3/4 inch long. For you metric
fans, that’s about 19 mm. As we are tying a brown spider, we select a
brown body. The foam bodies also come in tan, yellow, black, and white.
If you prefer a spider of another color, just select all the tying
materials to match the body color you want to tie. |
 |
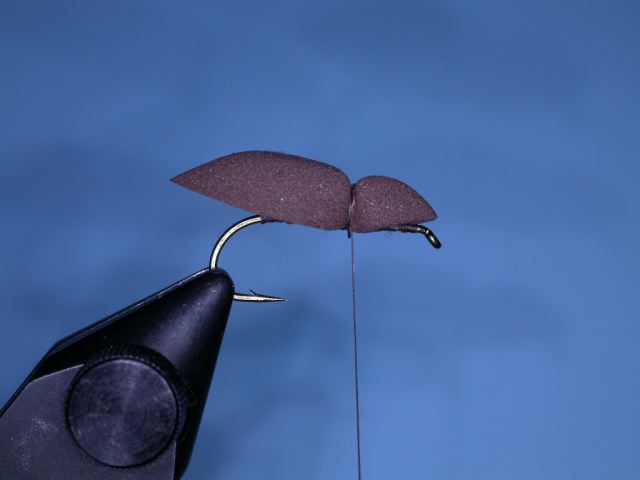
| 3 – Position the body on the top of the hook shank.
Align the front of the body at the rear of the hook eye. As the thread
should already be at the mid point of the hook shank, make a soft loop
around the body. Now increase the tension, and make several more loops.
You want the thread to be tied as securely as possible, but be careful ,
or the thread will break. If it does, don’t panic. The half hitch you
tied in step one will stop the fly from unraveling past that point. Just
snip off the tag end of the broken thread, and reattach your working
thread. Now proceed again, knowing that you just learned a good lesson
on thread control, and the importance of the half hitch. When the body
looks positioned properly, tie a couple of half hitches. |
 |
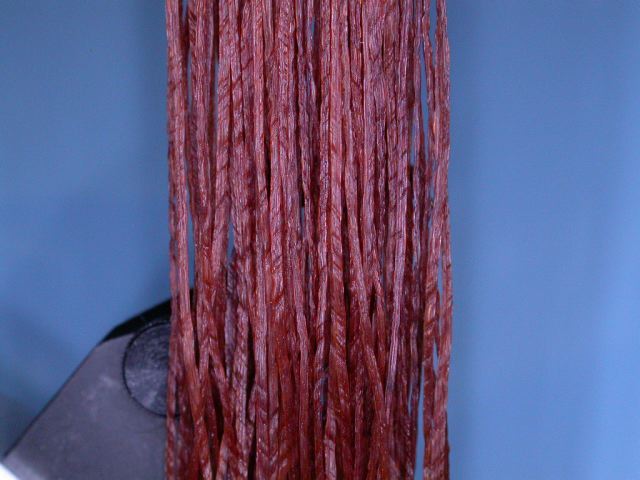
| 4 – For the legs, I like a material called ‘Fexli
Floss’. This is what it looks like. Feel free, however, to use the type
of leg material that you have on hand. |
 |
| 5 – Cut one piece of the leg material. The Fexli Floss piece is about 7 inches long. Cut this piece in half. Now cut these pieces in half. You should now have four pieces , each approximately 1 1/2 inches in length. Spiders have eight legs. Fish may or may not count, but I like to use ‘eight’ legs on a spider. A rule of thumb I use is to make each leg as long as the spider’s body. This isn’t rocket science, so make the legs as long as you like. Take two of the leg sections you just cut, and fold them equally around the working thread. Slide them down the thread, and against the side of the spider that is towards you. Palmer the thread up and over the top of the body to attach the legs. |
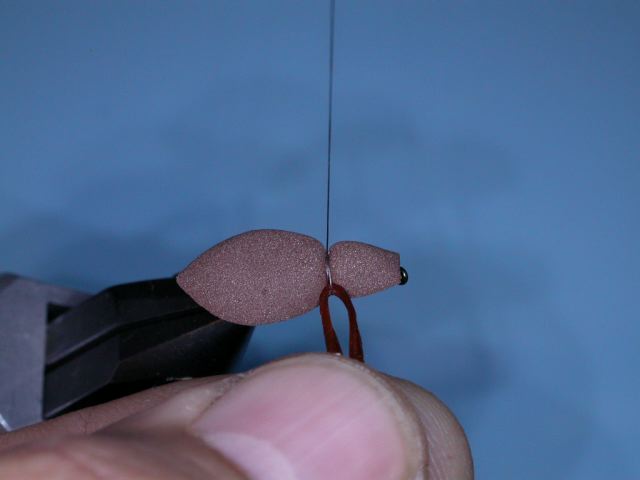 |
| 6 – Before you finish securing these legs, make any needed adjustments. You want to have four legs of fairly equal length, and positioned as shown in the picture. Then make a couple of more turns of the thread. |
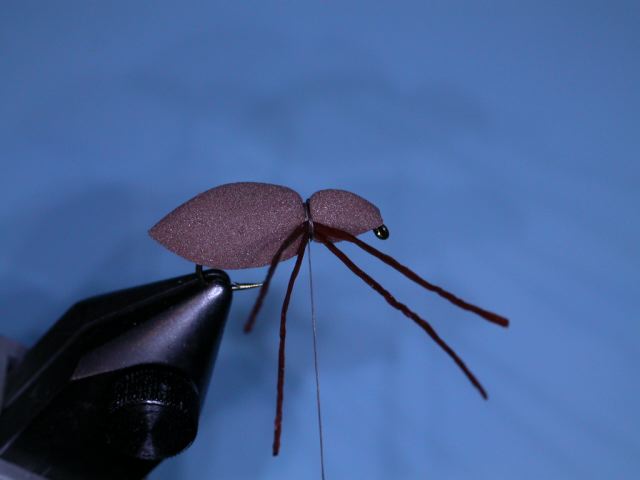 |
| 7 – Attach the remaining legs in the same manner on the opposite side of the body. Then bring the working thread forward, under the thorax portion of the spider’s body. Tie a half hitch behind the hook eye. |
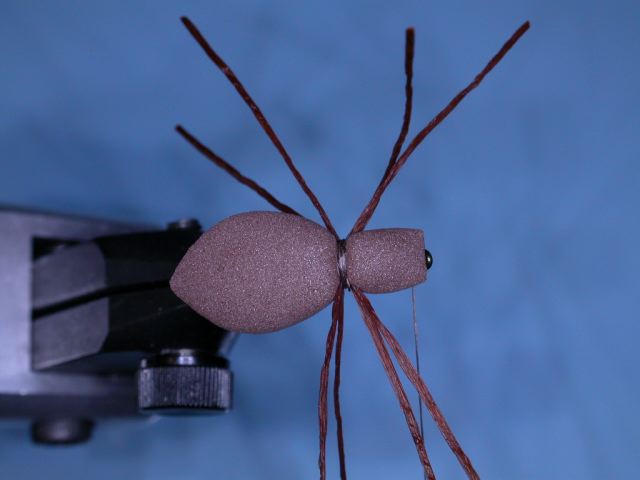 |
| 8 – Tie down the forward tip of the foam body with
several turns of thread. Tie a couple of half hitches, then a whip
finish. Snip off the working thread. |
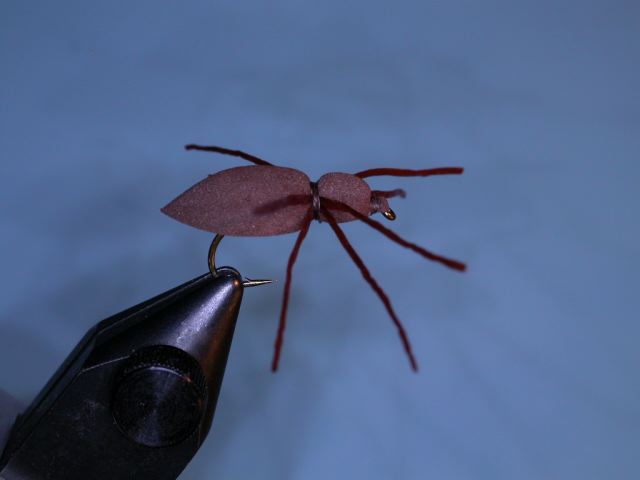 |
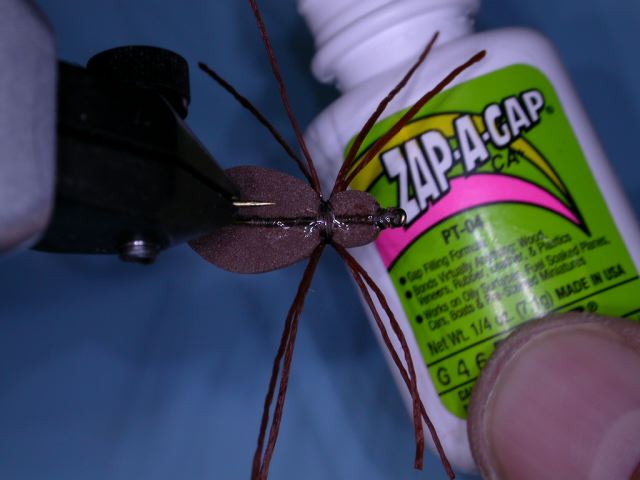
| 9 – Apply some type of ‘super glue’ to the thread all
along the underside where the body is in contact with the thread. This
will prevent the hook from moving out of proper alignment. |
 |
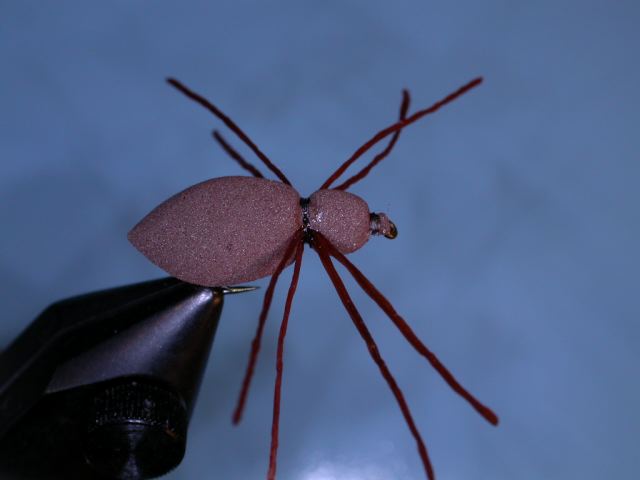
| 10 – Put some head cement, or the ‘super glue’, if you like, on the thread of the head, and the thread holding the legs. If the legs need to be trimmed to equal and proper length, do that now. If all went well, you should have a ‘spider’ that looks somewhat like the one pictured here. |
 |
© 2004 Robert R. Ireton, II
Copyright © 1998 - thisyear The Buckeye United Fly Fishers, Inc. Cincinnati, OH 45242
Page designed by Panfalone@fuse.net