|
Fly of
the Month
Bob Ireton brings together his
experience in fly fishing, aquatic entomology, and knowledge of fly
tying techniques and materials, to design and tie durable and
effective flies.
|
|

Volume 5, Issue 9
September 2004
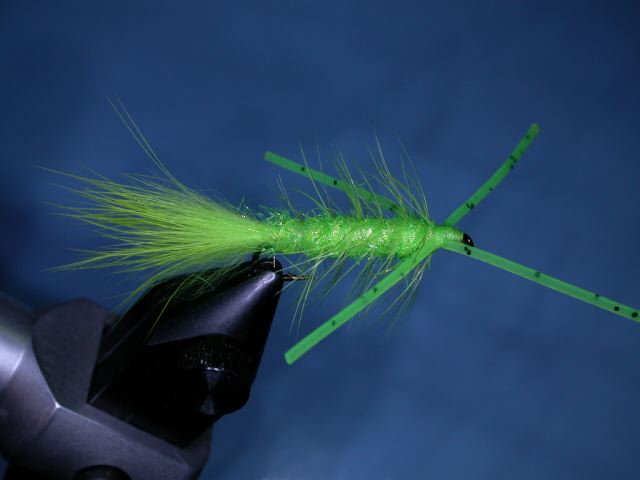
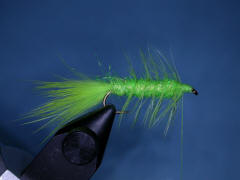
CHARTREUSE ICE WOOLLY BUGGER
Fly, Text, and Photography by Bob Ireton
Designing my own fly patterns is one of the most enjoyable aspects of
fly tying for me. I think about the various materials, and what flies,
or parts of flies, have been effective in the past. This past summer, I
began thinking about ‘chartreuse’, and other favorite materials and
flies. I like rabbit fur over marabou because it is more durable, rubber
legs because they just seem to attract fish, and the Ice Dubbing
residing in my stockpile of tying materials, just because it looked very
interesting! After a little R&D, I took a prototype to a local limestone
river for a test run. In two hours, I had landed a dozen bass, the best
being a very nice 15” Smallmouth. I then lost the prototype fly to a
deep snag, and the test was over. I was pleased with the results. The
‘Chartreuse Ice Woolly Bugger’ is very similar to that prototype. I hope
you have a good experience with it.
MATERIALS
Hook – Daiichi 1720, TMC 5263, Dai-Riki 710, Mustad 9672,
Orvis 1526, or any 3xl hook.
Size – 4-14 (or any size you can tie).
Thread – Uni 3/0 & 6/0 Chartreuse.
Weight – Lead wire.
Tail – Chartreuse rabbit hair.
Hackle – Chartreuse or Insect Green Bugger Hackle.
Body – Chartreuse Ice Dubbing.
Legs – Chartreuse/Black Flake Sililegs.
TYING STEPS - click on
pictures for larger view
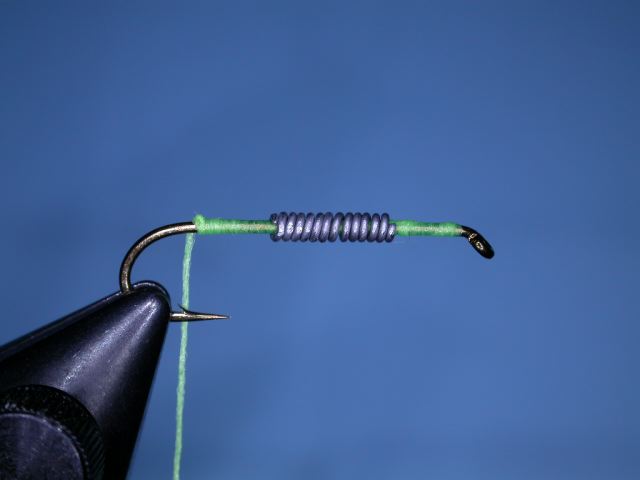
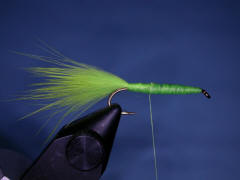
| 1
– Place
the hook properly in the vice, and mash down barb, if desired. For this
fly, I am using a Daiichi 1720, size 10. You could tie this pattern in
any size. Attach the 3/0 thread behind the hook eye, and lay on a good
base, stopping when the thread is above the hook barb. The 3/0 size
covers this, and the next step much faster than the 6/0. Tie a half
hitch. Using lead wire, or non-lead substitute, approximately the
diameter of the hook wire, wrap the weight to cover the mid half of the
shank. I used .020 wire on this fly |
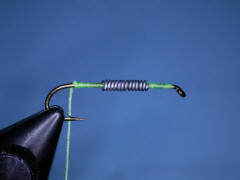 |
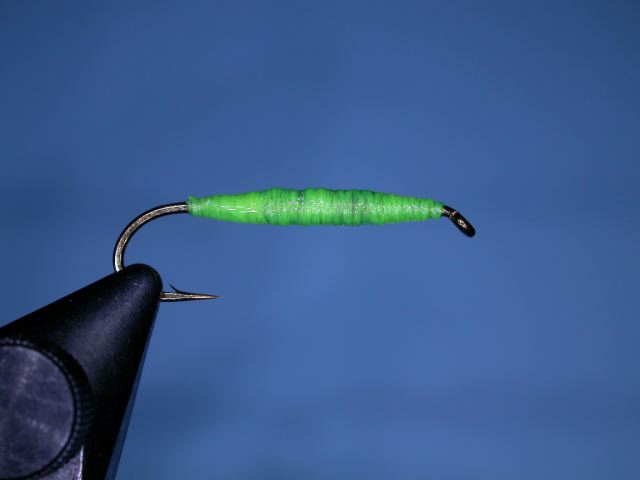
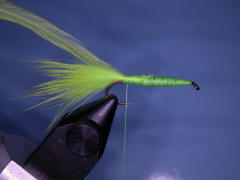
| 2 – Build a thread ramp on both ends of the lead
wire. This will enable the body materials to lay evenly. Cover the lead
with the thread. At either end of fly, tie a whip finish, and remove the
3/0 thread. Coat the entire thread surface with Dave’s Fleximent. |
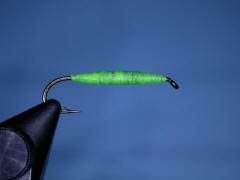 |
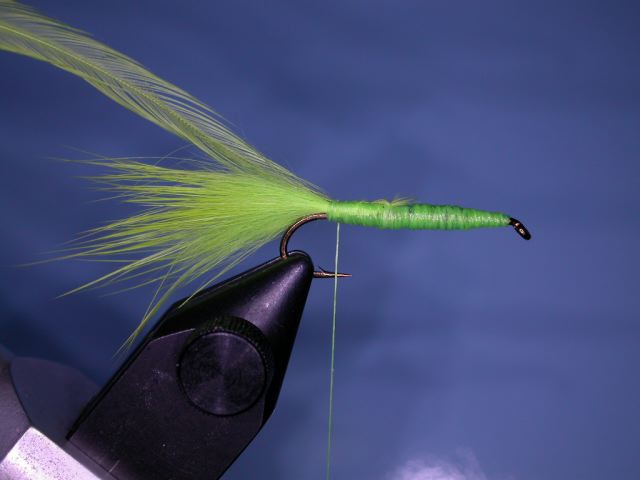
| 3 – Attach the 6/0 working thread on the shank
near the hook barb, and tie a half hitch. Snip a bunch of the rabbit fur
for the tail. On larger sizes, just leave the hair on the hide. Position
the hair on top of the shank, and let the tips of the hair extend
rearward the length of the shank. Tie in the hair, snip off any excess,
and cover the butts with the thread |
 |
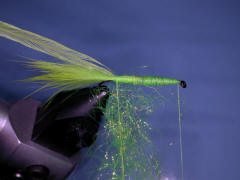
| 4 – Tie in the bugger hackle by the tip end, so
when you palmer it forward, the shiny side will be facing forward. The
hackle lays much better if you snip off the feather fibers on the side
of the hackle that will be against the hook shank. You could strip the
fibers off, but be aware that doing this removes a divet from the
feather shaft, weakening the shaft. You can do this step before or after
you tie the hackle in |
 |
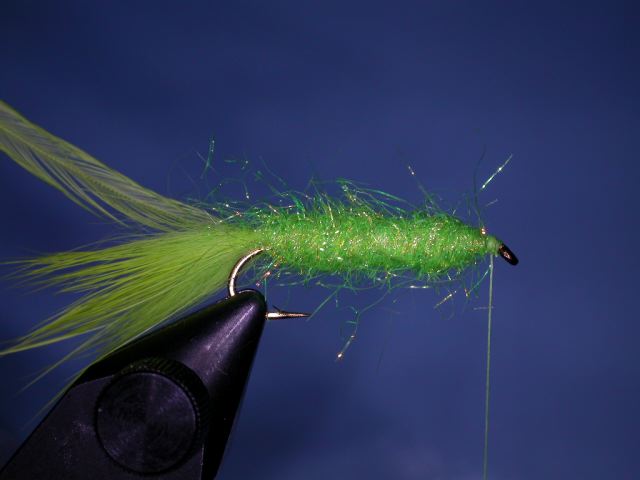
| 5 – Form a dubbing loop on the body above the
hook barb. This is easier to do if you can rotate the hook point away
from you. Bring the working thread forward, and tie a half hitch behind
the hook eye. Leave the working thread in this location. Place the ice
dubbing evenly in the loop of thread. After tying several flies using a
dubbing loop, you will get the feel of how long to make the loop |
 |
| 6
– Spin
the loop till you get a nice dubbing rope. Be aware that if you make the
dubbing rope too tight, it will break the thread. Practice will help you
master this technique |
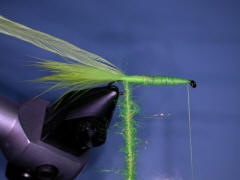 |
| 7 - If your vice has a thread holder, move it
into position, and hang the working thread over it. If you have a vice
with ‘rotary’ capability, this next step is much easier. Palmer the
dubbing rope forward, forming a nice body. Tie the rope down, snip off
the excess, if any, and tie a half hitch. If, by chance, your dubbing
rope was too short, just tie yours down, and make another dubbing loop |
 |
| 8 – Attach hackle pliers to hold the hackle, if
needed, and palmer the hackle forward. Space to suit your taste. Tie in
the hackle, snip off any excess, and form a nice head. Tie a half hitch |
 |
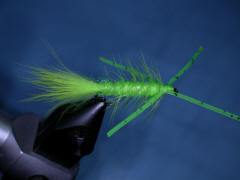
| 9 – Cut two pieces of leg material. Each piece
will be two legs, and each leg will be approximately the length of the
hook shank. Attach each piece in the middle to each side of the fly
where the body meets the head. Make any adjustments, and secure with
several more wraps of thread. Bring the thread forward of the legs, and
while holding the legs pulled back, tie several wraps of thread. Then
tie a couple of half hitches, then a whip finish. Snip off the working
thread, and apply head cement to the head |
 |
| |
|
© 2004 Robert R. Ireton, II
Page designed by
Panfalone@fuse.net
|