|
Fly of the Month Bob Ireton brings together his experience in fly fishing, aquatic entomology, and knowledge of fly tying techniques and materials, to design and tie durable and effective flies. |

|
![]()
Volume 4, Issue 6
June 2003
![]()
BEAD HEAD CADDIS LARVA
Fly,
Text, and Photography by Bob Ireton
Of the four stages of the caddis fly, (egg, larva, pupa, and adult), I think the larval stage offers the best chance of being eaten by a fish. The pupal stage would be a close second. The larval caddis of most interest to the flyfisher would be the free living, the net spinners, and the case builders, in that order. Of these three, fish will see more free-living caddis larva. They are widespread and abundant in the riffles and runs of freestone streams with high water quality. If you have seen or done any stream sampling, this is the critter you see a lot. I've seen mostly the green variety, sometimes called the green rockworm, but they are also tan. They are well equipped for life in this environment. The thorax has six strong legs, and there is a pair of claws, or anal prolegs, on the end of the abdomen. Some caddis larva are predacious.
The pattern featured here is the 'green rockworm' variety of caddis larva. The adults are pretty much uniform in size. The body is slim, but it ties and fishes better on a little larger size hook. When using this type of synthetic dubbing, I think a loop works better than just spinning the dubbing around a single thread. I tied using 8x thread to help keep the body compact. Feel free, however, to try your own variations.
MATERIAL LIST
Hook - Daiichi 1130, Dai-Riki 135,
Gamakatsu C12, Mustad 80250BR, Orvis 1639, TMC 2487
Size - 12
Bead - Gold 3/32
Thread -8/0 Brown
Prolegs - Brown working thread
Rib - 2x tippet material
Abdomen - Light olive 'Mottled Nymph Blend'
Thorax - Peacock 'Mottled Nymph Blend'
TYING STEPS - click on pictures for larger view
| 1 - Thread the bead onto the hook by holding the bead in one hand between thumb and fore finger, with the smaller size hole facing up. Holding the hook with a pair of tweezers, place point of hook into the smaller hole in the bead, and continue moving hook point through bead till it is well onto hook shank. Now move bead rest of way to behind eye of hook. Pinch down barb of hook, if desired, and place the hook properly in vice. Slide the bead rearward to midway of hook shank. Attach the thread behind eye of hook, and lay on a base the length of two bead diameters. Continue laying on thread back and forth, building up the base till the bead has almost a snug fit. Tie a half hitch, and then top the base with a whip finish. Cut off working thread. |  |
| 2 - Put some head cement on the thread base, and work the bead onto the thread till it is touching the hook eye. Reattach the working thread behind the bead, leaving about two inches of thread on the tag end to use for the prolegs. Wrap the thread around the hook behind the larger hole on the backside of the bead till the hole of the bead is covered. Make the thread in this area sloping rearward like a short ramp. Continue rearward, over the tag end of thread, stopping well behind the hook barb. Take the tag end of the thread, and form a horizontal loop extending rearward past the working thread. Secure this loop with the working thread, and tie a half hitch. Cut and trim the end of the loop to form the prolegs. | 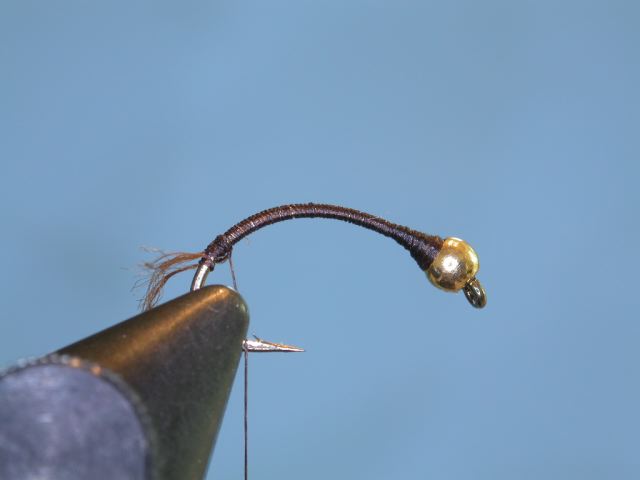 |
| 3 - Take a piece of the 2x tippet and flatten the end with plires. By doing this, the tippet material will attach to the hook shank flatter and more securely than if you did not do this step. |  |
| 4 - Hold the flattened end of the ribbing material against the top of the hook shank, and far enough up from the end to allow for one wrap of the abdomen to be behind the rib. Tie in the ribbing, and tie a half hitch or two. | 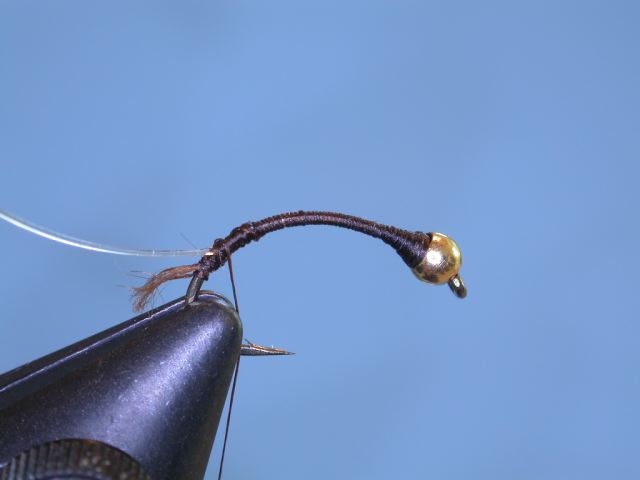 |
| 5 - Bring the thread behind the ribbing, and form a dubbing loop. Place the dubbing for the abdomen in the loop, with the amount of dubbing material starting sparser at the top, and increasing as it goes down the loop. This will cause a tapered body to be formed. Bring the working thread forward, stopping with space for a thorax. Tie a half hitch. |  |
| 6 - Spin the dubbing loop to make the dubbing rope, then palmer it forward, with the first wrap behind the attached rib. Stop where you tied off the working thread, and tie off the dubbing rope with several wraps. Snip off the tag end of the dubbing rope, and tie a couple of half hitches. |  |
| 7 - Make another dubbing loop, and using the thorax dubbing, form the thorax. Tie off, trim the tag as before, and do a couple of half hitches. | 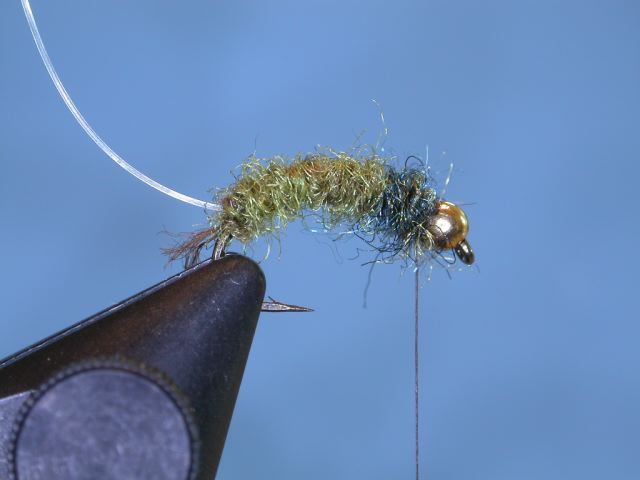 |
| 8 - Palmer the ribbing forward to give a segmented look, and tie off behind bead. Trim the tag end of the ribbing, and form a thin head behind the bead with the working thread. Tie a half hitch and a whip finish, and put some head cement on the thread wraps. Pick out the dubbing a little under the thorax to give the impression of legs, and any other finishing touches you would like. | 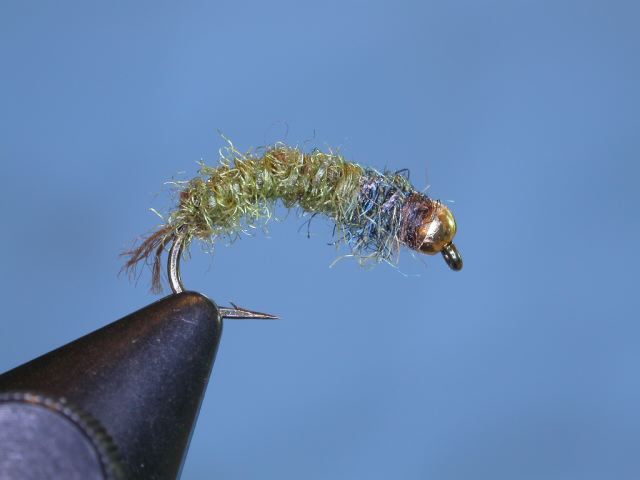 |
![]()
Copyright © 1998 - thisyear The Buckeye United Fly Fishers, Inc. Cincinnati, OH 45242
The Buckeye United Fly Fishers, Inc is a non-profit corporation organized under section 501(c)(3) of the Internal Revenue Code, incorporated in the State of Ohio for the preservation, conservation and wise use of our fishing waters and game fish; and to assist in the protection and improvement of our natural resources